Before you begin: Install iTunes
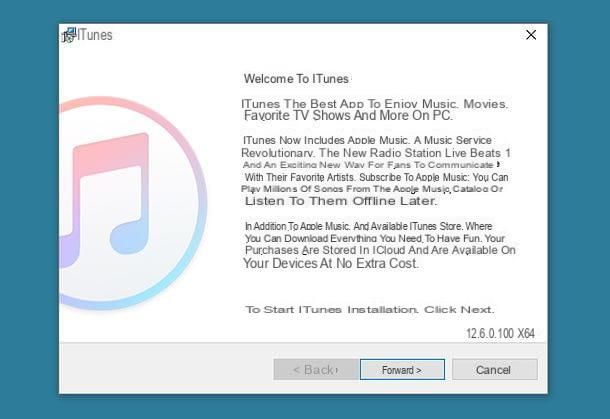
Many of the solutions for use iPhone as a hard drive or USB stick that I am about to propose require the presence of iTunes on the PC. iTunes, in case you have never heard of it (but it seems strange to me!), is the official Apple program that allows you to manage iOS devices from your computer. The software is completely free and is already included "standard" on all Macs, while it is available as a free download for Windows PCs.
If you use a Windows PC and have not yet downloaded iTunes, connect to the Apple website and click on the button Download 64 bit or button Download 32 bit, depending on whether you are using a 32-bit or 64-bit operating system. Next, open the iTunes installation package (ex. iTunes64Setup.exe) and click in sequence on the buttons NEXT, Install, Yes, Yes e end to conclude the setup.
At the first connection between iTunes and iPhone, regardless of the operating system installed on your computer, you will have to authorize the communication between the phone and the computer by clicking on the button Continue that appears on the Windows or macOS desktop, by pressing the button Authorize which is displayed on iOS and typing the Unlock PIN of your iPhone.
File Manager for iOS

One of the simplest solutions to use the iPhone as a hard drive or USB stick is to install a file manager on iOS. By installing a file manager on iOS, an alternative to the one already present "standard" in the system ("File", which is excellent but still has too many limitations), you will be able to copy files to and from the iPhone in a very simple way. Going into more detail, you can exchange files between computers and iPhones using your Wi-Fi connection, then acting directly from the browser, without going through iTunes; or you can take advantage of the classic iTunes file sharing function, choosing to act via USB cable or wirelessly.
Once transferred to the iPhone, the files will be viewable directly on the latter (always using the file manager installed on iOS) and can be downloaded to the PC, using iTunes or the web interface of the file manager. Are you wondering how much such a complete and flexible solution can cost? Zero euros! Yes, you read that right! Believe it or not, on the App Store there is a file manager that allows you to do everything I just told you - and more - at no cost: its name is Documents and it is been produced by Readdle, one of the most established software houses in the field of productivity software for iOS.
To download Documents to your iPhone, open theApp Store (the "A" icon on a light blue background located on the iOS home screen), select the tab Search which is at the bottom right and search "documents" in the special bar positioned at the top. Then locate the icon of Readdle documents (the "D" on a white background) and proceed with the download of the application by pressing first on the latter and then on the button Get. You may be asked to verify your identity by typing your Apple ID password, using Touch ID or Face ID.

Once the Documents app download is complete, you can proceed with copying files to and from your iPhone. I advise you to start with the transfer mode via Wi-Fi, which in my humble opinion is the simplest and most immediate.
Then start Documents, follow its initial presentation and grant it to the app all the required permissions. At this point, select the tab Documents located at the bottom left, presses the icon of thegear located at the top left and activate the function Drive Wi-Fi by first tapping on the relevant item and then moving up ON the lever located next to the wording Activate Drive.
To make the use of this function more secure, also activate the request for a password by moving to ON the lever for the option Ask for the password and typing, in the fields that appear below, the combination of username e Password you want to use to establish the Wi-Fi connection between iPhone and computer.

Now all you have to do is go to your PC, open the browser you usually use to surf the Internet (eg. Chrome o Safari) and connect to the address that appeared in the menu Drive Wi-Fi of Documents, for example 192.168.1.2. For the procedure to be successful, iPhone and computer must be connected to the same Wi-Fi network.
After connecting to the Documents web panel, enter the username and password needed to access it (the ones you chose before in the Documents settings) and proceed with the file exchange operations between iPhone and computer.
- To send a file to the iPhone, click on your button Choose file located at the bottom of the page, select the file to be transferred to the "iPhone by" and press the button Upload file to start copying.
- To download a file from iPhone to computer, simply click on its name in the Documents web panel.

The Documents web interface is very convenient, it does not require the presence of iTunes on the computer to be used, but it allows you to transfer only one file at a time. If you want to bypass this limitation, you have to resort to the good old iTunes and its function of file sharing, through which you can transfer one or more files (or even folders) between iPhone and computer with a simple drag-and-drop.
To transfer files to and from Documents using iTunes, connect your iPhone to your computer via Lightning cable, click onsmartphone icon that appears at the top left (in the main program window) and go to File sharing, in the iTunes sidebar.
At this point, select Documents from the box Applications and drag the files you want to transfer to the iPhone in the box Documents, located on the right.

If, on the other hand, you want to perform the reverse operation, that is, you want to copy files from the iPhone to the computer, select the latter from the box Documents and drag them to your favorite PC folder. Easier than that ?!
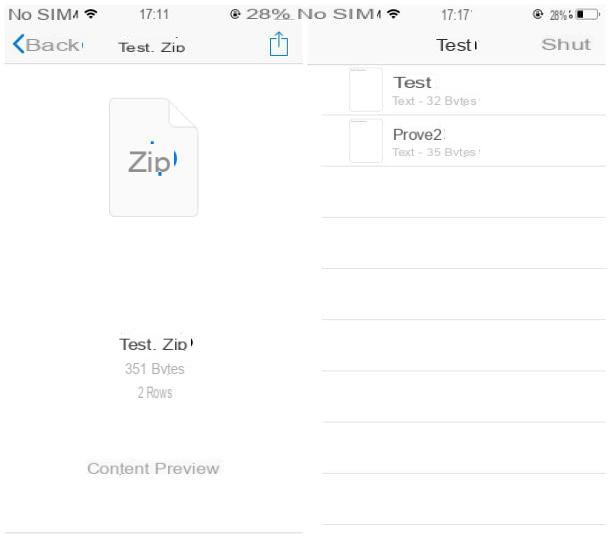
Once copied to the iPhone, the files can be managed and viewed directly from the app Documents, by going to the tab Documents and selecting them from there.

Please note: if you want, you can use the iTunes file sharing function even without physically connecting the iPhone to the computer. Just turn on the Wi-Fi connection in the program settings. To do this, connect the iPhone to the computer via Lightning cable, select thesmartphone icon that appears at the top left, choose the item Riepilogo from the iTunes sidebar and put the check mark next to the item Sync with iPhone via Wi-Fi.
Programs to use the iPhone as a USB stick

A valid alternative to Documents and file managers for iOS is represented by those programs that allow you to access the contents of the iPhone memory from a PC. Among these, I would like to recommend iMazing, which is compatible with both Windows and macOS and offers a series of really interesting features: in addition to allowing access to the internal folders of the iPhone, and therefore the transfer of data between the computer and the Apple smartphone, allows you to create full iOS backups, transfer data from one iPhone to another, manage apps and much more.
iMazing can be downloaded and used for free, but with some limitations: for example, it is not possible to transfer more than 100 files or more than 50 photos to and from the iPhone, while the backups are unlimited. To remove these limitations, you need to purchase the full version of the program for 39,99 euros.
That said, to download the free version of iMazing, connect to the program's website and click on the button Free download. After the download is complete, if you are using a PC Windows, start the installation package named iMazing2forWindows.exe e, nella finestra che si apre, fai clic prima sul pulsado Yes and then NEXT. Then put the check mark next to the item I accept the terms of the license agreement and finish the setup by pressing the buttons in sequence NEXT (three consecutive times), Install e end.

If you use a Mac, to install iMazing, you need to open the dmg package you downloaded from the program's website and you need to run the executable iMazing contained in the latter. After that you have to click on the buttons apri, Install e apri And that's it.

From this point on, the steps to take are almost identical on Windows and macOS. Then click on the button Later of iMazing, in order to postpone the purchase of the full version of the software, connect the iPhone to the computer using the Lightning cable supplied and, if required, unlock the device by entering the appropriate PIN.
Then click on the button a second time Later (to postpone backing up your iPhone) and select the icon File System to access the smartphone folders.
Then choose the folder in which to copy your files (using the side navigation bar), click on the button Copy to device (bottom left), indicate if you want to copy a fillet or a folder on the "iPhone by" and choose the elements to copy to the device. If, on the other hand, you want to create a new folder, click on the appropriate button at the bottom.
Once you have finished copying the files, you can access them by navigating with iMazing to the folder where you copied them.

To perform the reverse operation, i.e. to copy files from the iPhone to the computer, select the icon File System iMazing, access the folder that contains the data of your interest, select the latter and press the button Copy your PC which is at the bottom left.
Finally, choose the folder where you want to copy the selected files from the iPhone and click on the button OK to start data transfer. Simple, isn't it ?!
Other solutions to use iPhone as a USB stick

The procedures that I have shown you above are the best to use the iPhone as a USB stick. However, there are other solutions that are valid and therefore worth considering: here are some of them in detail.
- Transfer photos and videos via File Explorer - if you are using a Windows PC on which iTunes has been installed, you can use theFile Explorer to access the internal folders of the iPhone and copy the photos and videos on the memory of the "iPhone by". I have explained to you in detail how to do it in my tutorial on how to download photos from iPhone to PC.
- Use cloud storage services - even if it's not exactly the same as using the iPhone as a USB stick, you can use cloud storage services to transfer data of all kinds to iOS, via the Internet. Among the most useful and popular cloud storage services I point out Dropbox, Google Drive and of course iCloud Drive (which is included "standard" on all Apple devices). You can learn more about how each of them works by reading my tutorials, which I have just linked to you.
- Buy USB sticks for iPhone - a great way to easily transfer data to and from iPhone is to buy a USB stick with Lightning connection, which, once connected to the charging port of the "iPhone by", allows you to copy files to and from the latter through a special app. Below are some devices of this kind, which I'm sure will interest you.


