How to create an Apple ID (preliminary procedure)
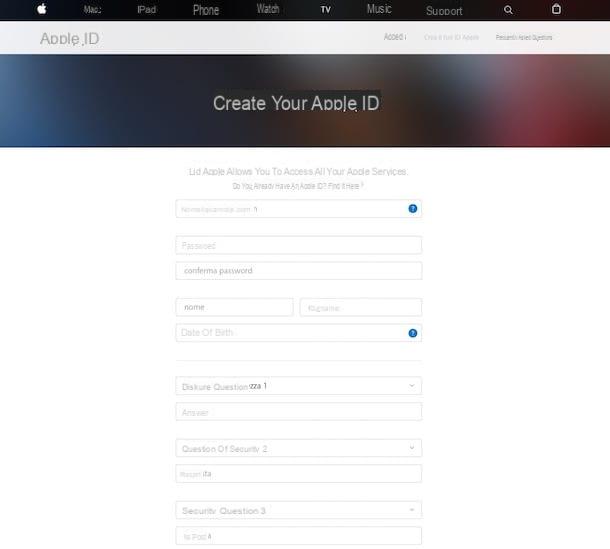
If you want to use iCloud and all of its backup features, including the iCloud Drive cloud service, the first thing to do is to make sure you have successfully created an Apple ID. In theory, this procedure should have already been performed during the setup of your iOS mobile device: the creation of an Apple ID is necessary for the use of an iPhone or an iPad.
However, for more completeness of information and, to meet your needs as much as possible, if you have not yet carried out this procedure, I will explain what to do to create an Apple ID.
In order to create an Apple ID it is necessary to go to the official website of the Cupertino company. The Internet page that I have indicated to you concerns the appropriate registration form for creation free Apple ID. You will then have to fill in all the mandatory text fields and continue by pressing the button Continue. Keep in mind that you will then be asked to confirm your identity via an email that will be sent to the address you provided during registration.
Do you need to know what is the walkthrough that will allow you to create an Apple ID? No problem, I can help you: I suggest you read my in-depth guide dedicated to the topic in which you will find the explanation step by step.
Therefore, make sure that you have correctly completed the procedure for creating your Apple ID; only by acting in this way can you start using iCloud and take advantage of the cloud storage service, iCloud Drive.
How to activate iCloud Drive on iOS
iCloud Drive is a cloud storage service based on iCloud, the native service of Apple devices. To use it and allow iCloud to synchronize online all the documents that will be uploaded to this service, you must have enabled iCloud backups and have activated the related iCloud Drive item.
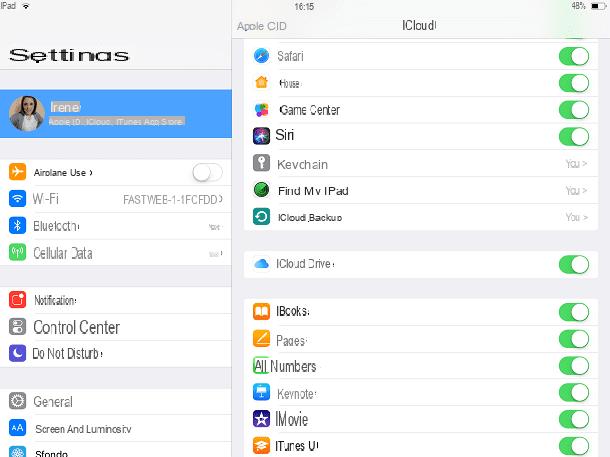
To check this procedure, go to the app Settings of iOS (symbol of a gear) and tap on your name, in order to access the special section dedicated to iCloud settings.
From the next screen, tap on the iCloud item and check that, corresponding to the wording Apps that use iCloud, the wording is active iCloud Drive. If this is not active, move the lever from OFF a ON to activate it.
However, keep in mind that iCloud Drive storage space is limited as iCloud is a backup service that only offers 5 GB of storage. free. However, you can expand your iCloud storage plan (and consequently also iCloud Drive, at any time).
To do this, click on the item Manage Space from the iCloud screen and then press on the wording Perform the upgrade. The purchase plans to increase iCloud storage are as follows:
- 50 GBof space a 0,99 per month
- 200 GB of space a 2,99 per month
- 2 TB of space a 9,99 per month
Alternatively, a subscription is available Apple one which for 14,95 euros / month offers 50GB of iCloud Drive space more Apple Music, Apple TV + and the games of Apple Arcade. The Family version of the plan with 200GB of iCloud Drive space. To activate Apple One you have to go to the menu Settings> [your name]> Subscriptions> Apple One on iOS / iPadOS.
How iCloud Drive works on iOS
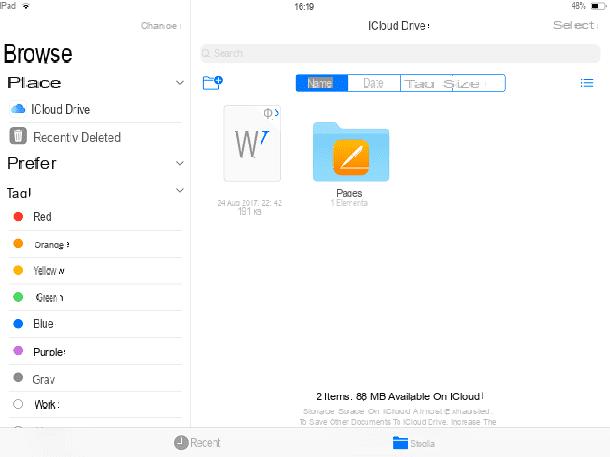
Once iCloud Drive is activated, you can use it on your iOS device through Apple's default application, called Fillet. The application in question should already be present in the memory of your Apple device but, if you have deleted it by mistake, you can easily reinstall it. In fact, search for it using the App Store search engine and press the button with the speech bubble symbol with a down arrow to install it back into your device memory.
The application has two main screens: the section Recent which allows you to view all recently opened documents and section Shop by Department, through which you can have access to all files uploaded to the iCloud Drive cloud storage service.
Then click on Browse and then on the wording iCloud Drive to view all the documents you have stored online. If these are not immediately available for reading, the speech bubble symbol with a down arrow. Then tap on the document you want to have access to to download it to your device's memory.
Once you have downloaded the document in the memory of your device you can view it in offline mode. Keep in mind that, whenever you open the document in question, you can possibly also share it in other applications. To do this, press the button with the symbol of sharing and independently choose where to share the file you opened by tapping the button of a specific application.
How iCloud Drive works on Windows
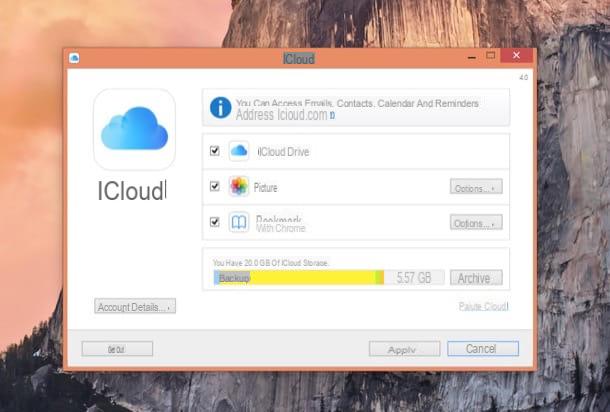
Viewing all documents stored on iCloud Drive via your Windows PC is absolutely possible. In order to perform this purpose, the iCloud desktop client installation and configuration is required. In the following lines I will then explain how to proceed.
In order to use the cloud storage service, you must first download the iCloud client for Windows. Then go immediately to the official website of the storage service and download iCloud by pressing the button Download.
Then wait for the file to download and double-click on the executable to begin the software installation procedure on the PC. As for the configuration, you will be asked to login. You will then need to type in the login information you created earlier for your Apple ID.
Once you have logged in, you will then be asked to place a check mark on the items to be synchronized on your PC. The wording iCloud Drive will be present on this screen. Then tap on it and wait for the files to be synchronized to have access to them also on the PC (the files will be synchronized in a local folder, whose path is C:UserstuonomeiCloudDrive).
If you want to use iCloud on Windows also to have access on PC a Gallery e Bookmarks of your mobile device, put the check mark next to the respective items. This way the data will be synchronized on your computer and you can view it at any time.
How iCloud Drive works on Mac
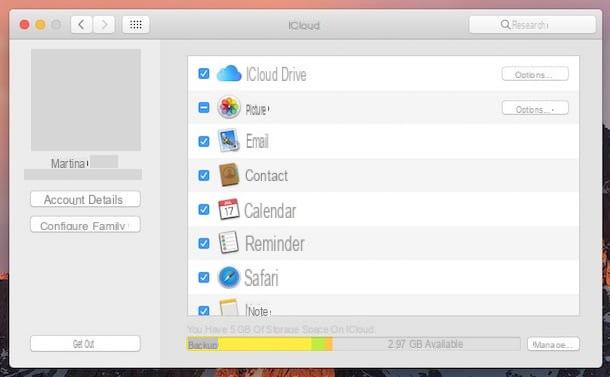
On Mac computers, it is not necessary to download the iCloud desktop client, as the service is already present natively on Mac computers. To use iCloud Drive on Mac and be able to view documents at any time, you will need to make sure you have activated some items in iCloud settings.
To do this, the first thing you need to do is to click on the icon with the shape of the magnifying glass located at the top right of the main screen of your Mac. This will open the functionality of Spotlight Search: then type system preferences in the text field you see on the screen and press the button Submit to confirm the search.
As soon as you see the screen dedicated to system preferences on Mac, locate and tap on the wording iCloud. By doing this you will be able to launch the iCloud application on the Mac as well. Note that you may be asked to log in again using your iCloud login details (they are the ones you have after creating your Apple ID).
Once you have successfully logged in (and possibly approved access in case you are prompted to perform a login verification), you will be able to access the iCloud sync settings on Mac.
In case you only want to sync documents from iCloud Drive, put the check mark next to the relevant item. Since this is the iCloud application for Mac you can also synchronize other items such as Photos, Mail, Contacts, Calendar, Reminders and so much more. To confirm the synchronization of the items, just close the iCloud window by pressing the button X.
Once synchronized, to have access to your iCloud Drive documents on the Mac, press the icon Finder (symbol of a smiley). Then click on the wording iCloud Drive which you can see in the left sidebar. In this way, you can also view all the documents you have uploaded to the cloud storage service on Mac.
How iCloud Drive works via browser
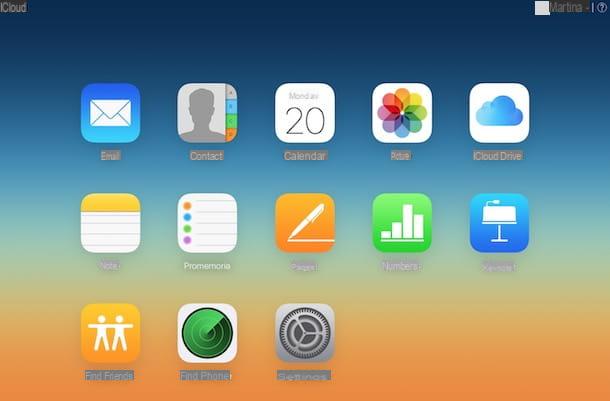
Do you want to access the documents you have uploaded to iCloud Drive but don't have your own computer to use the desktop version of iCloud? No problem. The iCloud Drive service can be used via a web browser.
All you have to do is go to the official iCloud website; then log in to it using the data that refer to your Apple ID (e-mail e Password) and then press the button with the arrow symbol per effettuare l'accesso.
Once you have access to the main iCloud screen via the web, you will find several buttons: they all refer to the web version of the related iCloud tools. In particular, therefore, if you want to view all the files you have stored on iCloud Drive, all you have to do is click on its icon.
You can view iCloud Drive files online by clicking on them but alternatively, if you want to download them to the PC you are using, click on the document and press the button Download (symbol of a speech bubble with a down arrow). You can also use the web version of iCloud Drive to upload documents by importing them via the button Charge (symbol of speech bubble with an upward arrow), or via the more common drag & drop.
How iCloud Drive works


