Have you replaced your Android smartphone with a newer model and can't retrieve your address book from your old phone? Have you accidentally deleted some contacts from your Android address book and would like help recovering them? Maybe I can help you. Give me five minutes of your time and I'll explain you how to recover Android address book in various ways.
First, we'll see how to bring contacts from one Android smartphone to another using the online synchronization services offered by Gmail. Then we'll see how to do the same operation "manually", exporting and importing a VCF file with the Android address book, and finally we'll try to recover deleted contacts from Android using some solutions suitable for the purpose and Gmail that - maybe not everyone knows - includes a restore function to restore the status of the address book to a previous date (up to 1 month before today's date).
If you've accidentally deleted names from your smartphone's address book and you didn't have sync enabled with Gmail (or another cloud service), I'm sorry but I don't think there's much you can do about it. If the accident happened recently you might have some hope by using data recovery software that works directly on the smartphone memory, but it's a really desperate attempt. Don't say I didn't warn you!
Android phonebook recovery via Gmail
The fastest way to copy your address book from one Android smartphone to another is to enable Gmail sync on both devices.
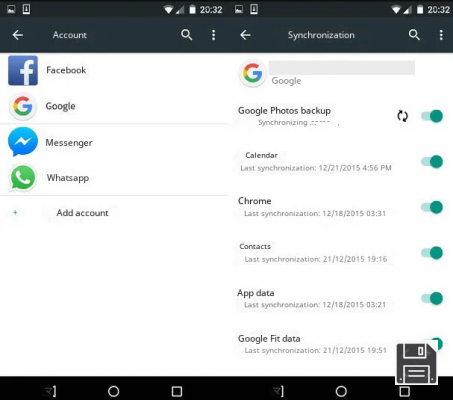
If you still have your old smartphone at hand, turn it on, go to the Android settings (the gear icon that you find in the screen with the list of all the apps installed on the device) and select the Account item from the menu that opens.
Then click on the Google logo, select your Gmail address and check that the toggle next to the Contacts option is active. If it is not, activate it by tapping on it and wait for the phonebook sync with Gmail to start.
If you've never had a Google account set up on your old phone, you can easily fix this by going to Settings > Android Accounts, selecting Add Account and tapping on the Google logo on the screen that opens. Then sign in with your Gmail account details and make sure that contact sync is enabled as explained above.
Now, to transfer your contacts to your new smartphone, all you have to do is set up the same Gmail account on your new smartphone that you set up on your old one, and activate the phonebook sync.
Go to Settings > Android Accounts and make sure that the Contacts option is enabled in the Google Account settings. If you have not yet set up a Google account on your new smartphone (or you have set up a different one than the one you used on your other phone), go to the Settings > Android Accounts menu, select Add Account, click on the Google logo and sign in with the Gmail account you used to sync your address book.
If everything goes well, within a few seconds you should find all the contacts you had on your previous smartphone on your new phone.
Was your previous smartphone not an Android phone but an iPhone? No problem, you can also take advantage of Gmail synchronization with iOS. I explained in detail how to proceed in my guide on how to transfer contacts from iPhone to Android.
Recover Android address book from VCF file
If for one reason or another you do not want to use the synchronization services offered by Google, you can recover Android address book by "manually" exporting the contacts from your old phone and importing them on the new one. To do this, simply open the Contacts app on your old smartphone, export the VCF file with the entire address book and import it on your new phone. If you need more precise instructions, follow the steps below.
- Open the Contacts application on your old smartphone, click on the (...) button at the top right, select Import/Export from the menu that opens and tap on the option to export the entire address book as a .vcf file. Then choose the name and the folder where you want to export the file and you're done;
- If you are using a Samsung smartphone, the procedure is slightly different: after opening the Contacts application, select the Contacts tab and click on the (...) button at the top right. Then you have to select the Settings item from the menu that appears, go to Contacts, select the Import/Export option and choose whether to export the address book to the internal memory of the device or to a microSD card;
- Now you have to export the VCF file with the contacts to your new smartphone. To do this, you can send yourself the file via email or save it on a cloud storage service (e.g. Dropbox). Then install a file manager like ES File Manager and use it to navigate to your smartphone's Home folder or the root directory of your microSD card (depending on where you saved the VCF file). Next, keep your finger pressed on the phonebook file (e.g. 00001.vcf), click on the More button that appears at the bottom right and select Share from the menu that appears. At this point, choose whether to send the file via email by selecting the name of an email client (e.g. Gmail) or save it on a cloud storage service (e.g. Dropbox) by selecting its icon;
- Once it has been sent, take your new smartphone and download the VCF file of the address book on it by opening the email you sent yourself or by accessing the cloud storage service where you saved it (e.g. Dropbox). Then open the Android Contacts application, click on the (...) button at the top right and select Import/Export from the menu that opens. At this point, tap on Import from .vcf file, choose the cloud account to synchronize the contacts (e.g. Gmail) and select the vcf file with the address book of your old smartphone;
- If you have a Samsung phone you have to follow a slightly different procedure: first you have to select the Contacts tab, then the (...) button located on the top right and then you have to go to Settings > Contacts > Import/Export.

If you want, you can also export a VCF file from the contacts you have saved in your Gmail address book. To do this, connect to the Google Contacts service. Then click on More in the left sidebar and select Export at the bottom.
Then check the box next to Contacts and vCard (for iOS contacts) and click Export to complete the process.

Recover Android address book from previous backups
If you have a good habit of backing up your smartphone on your PC or on an external microSD card, you can recover your phonebook contacts by simply restoring one of the backups you created previously.
For example, if you have a Samsung device, you can restore the address book by relying on the Smart Switch application or its desktop counterpart (which is compatible with Windows and macOS). If you have smartphones of other brands you can use the appropriate utilities to synchronize with the PC, while if you have used backup applications such as Easy Backup & Restore you can rely on them to restore the address book.

For more information see my tutorials on how to connect a smartphone to a PC and how to backup on Android where I talked about all the apps and PC software that could help you restore your phonebook backups.
Recover deleted contacts from Android
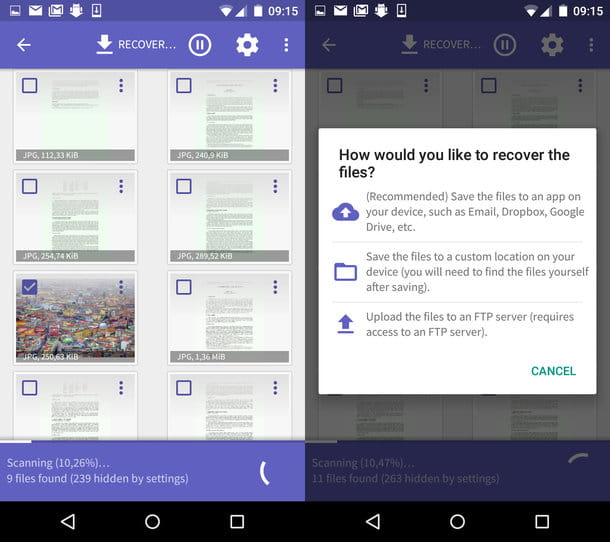
If you want to recover contacts on a phone that wasn't connected to Gmail and doesn't have address book backups, the only solution you can try to turn to are those software that operate directly on the smartphone memory. The chances that you will be able to recover deleted contacts this way are pretty slim, but at this point, it doesn't hurt to try!
EaseUS MobiSaver for Android
EaseUS MobiSaver for Android is one of the best software tools to recover deleted files from Android smartphones. It is compatible with all popular versions of the Android operating system. To work it requires root permissions, so if you haven't done it yet find out how to root Android by following my tutorial on the subject.
To download EaseUS MobiSaver for Android on your PC, go to the program's website and click on the Free Download button. Once the download is complete, double-click on the file you just downloaded to your PC(emsa_free.exe) and click on Yes and then OK.
Then accept the terms of use of the program, putting a check mark next to the item I accept the agreement, and complete the setup by clicking on Next four times in a row and then on Install and Finish. If you are asked to install drivers, accept by clicking on Install.
Now connect your smartphone to the computer using the included USB cable, launch EaseUS MobiSaver for Android (if it hasn't already started up by itself), wait for the device to be detected and click the Start button located in the middle of the program window.
Now, if prompted, enable USB debugging on Android. If you don't know how to do this, go to the Settings > Developer Options menu on your smartphone and tick the USB Debugging option. If you don't see "Developer options" in your Android settings, enable it by going to About phone and clicking on the Buid number tab seven times in a row.
Once you've enabled USB debugging on your computer, check the box next to Always allow from this computer and say OK to the warning that appears on your smartphone to allow access by EaseUS MobiSaver for Android. Then grant root permissions to the application (by clicking the Grant button) and wait for EaseUS MobiSaver to find all recoverable files from your device.

Once the scan is complete, select Contacts from the sidebar of EaseUS MobiSaver for Android, tick the contacts to be recovered and click the Recover button to save them to your PC. To display only the deleted contacts, move the Only display deleted items to ON in the top left corner.
Once recovered, you can copy the contacts to your smartphone by emailing them to yourself, copying them to a microSD card or saving them to a cloud storage service (e.g. Dropbox or Google Drive). The process of importing contacts into Android is the same as we saw earlier together.
ATTENTION: The free version of EaseUS MobiSaver for Android allows you to recover only one file, and therefore only one contact, at a time. To recover multiple files at once you have to buy a license for the program for 36.95 euros. More info here.
Gmail

As mentioned in the opening of the post, Gmail includes a feature that allows you to restore your address book to a previous state and thus recover deleted contacts. If you have deleted important contacts from a smartphone associated with Gmail, you can then take advantage of this feature to recover the deleted names and synchronize them back with the phone.
The procedure to follow is extremely simple. If you want to recover Android address book by recovering deleted contacts from Gmail. To do this, connect to the Google Contacts service. Then click on More in the left sidebar and select Undo Changes at the bottom.
Then choose whether you want to restore the address book status 10 minutes ago, 1 hour ago, yesterday, 1 week ago or a custom date (knowing that you can go back a maximum of 30 days) and click Confirm to apply the changes.
Once you've restored your Gmail address book, turn on contact syncing on Android as we've seen above (if you haven't already), and the accidentally deleted names should be back where they belong.
Alternatively, you can also "manually" export the VCF file of the Gmail address book and import it on your smartphone. We've seen this procedure together before as well.


