 Il GIMP program is free and open source, (or The GIMP, as many sites call it) has established itself as a real alternative to Photoshop in the field of photo retouching programs, showing advanced features that have nothing to envy to Adobe's paid program. If in the professional and work environment perhaps it is better to focus on a paid license of Photoshop, in the home environment we can do most of the basic photo editing operations, within everyone's reach, using exclusively GIMP.
In this guide we will show you how to retouch photos using GIMP, free, in the most probable scenarios, so as to learn how to use it immediately. At the end of the guide you will be struck by the potential of this open source program and you will hardly miss Photoshop (which should still be purchased in the case and is very expensive).
READ ALSO -> Best alternative graphics programs to Photoshop
Complete Guide to GIMP
Before seeing how to best use GIMP we will show you in detail all the features of the interface, so that you can immediately find the tools that we used to use on other programs such as Photoshop. If we haven't downloaded GIMP on our computer yet, we can fix it quickly by downloading the program's installer from the official website.
Interface features
If we have never used GIMP before, it is better to immediately familiarize yourself with its graphic interface, very similar to the one visible on commercial programs such as Photoshop (for many users a point of reference also aesthetically).
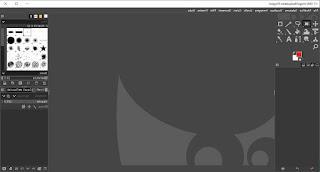
At the top left we find all the main tools to work on each single image, while at the bottom left we find the menus where you can configure the parameters of each individual tool, the menu with the history of the cancellations made and the menu of the connected devices and the menu of the images used. At the top right we find the secondary tools to change the shape of brushes and the style of the selected tool, as well as being able to change the characters and access the history of open documents; at the bottom right instead we find the menu with image levels, the menu of channels and paths, essential to be able to work on an image in every detail.
At the top we find the classic drop-down menus, where we can access other useful tools for photo editing; the menus that we advise you to memorize immediately are Image, Subscription, Colors, Instruments e filters, which will be used often during the works (as we will also see in the following chapters).
How to open and save images
One of the first things we have to learn to use on a new photo retouching program are the keys to open new images and the keys to save new images (after having edited them). To open new images, just launch the program and click on the menu at the top left Fillet -> apri.
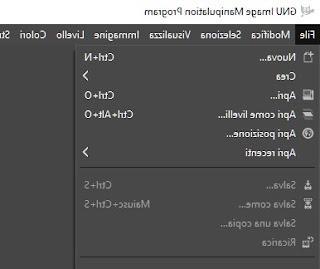
We select in the file manager that will open one or more images to be opened in GIMP; if we want to create an empty image (a sort of "sheet" that we can fill) just click on the menu Fillet -> New and choose the aspect ratio of the new empty image (we recommend clicking on models and select i A4 sheets, then choosing whether to place it horizontally or vertically). All image files will open as tabs within the program, at the top of the program.
After making all the necessary changes, we can save the edited image by clicking on Fillet -> Export (if we want to overwrite the original file) or Fillet -> Export as (to change name and extension).
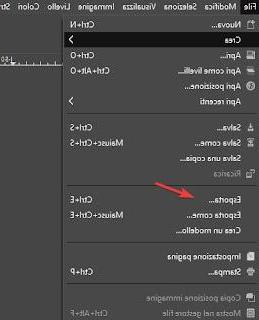
The file manager will open again, where we can choose the location where to save the file and its extension.
How to move a selection into another image
Do we have images to combine into one (for example, front and back of the identity card or tax code)? We can move an image or a selection of it into another image (even empty, as seen above) with the tools present in the toolbar and with keyboard shortcuts.
We open the image or images to move, create an empty sheet (or select where to paste the parts of images) then select what to copy using the tool Rectangular selection, in the upper left corner.
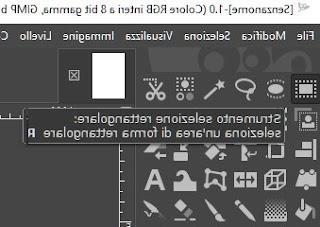
Once this tool has been selected, move the mouse to the corner of the image (or part of the image) and, holding down the left mouse button, draw a rectangle that also includes the image selection. If we have to move the whole image, we can also directly press CTRL + A on the keyboard, after activating Rectangular selection. As soon as we see the selection appear with flashing dashes, we press CTRL + C on the keyboard, then let's go to the empty image or the image in which to paste the selection, then press CTRL + V to paste.
If we have done everything correctly we will see the copied image appear in the other image; if the dimensions are "wrong" or the rotation is not correct, we recommend that you read the chapter How to rotate and resize an image or a selection later on. If the contours of the object to be selected are not so "sharp" (a person, a part of the landscape, etc.), instead of the Rectangular selection we recommend using the tools Fuzzy selection, Smart scissors or Paths.
How to remove red eyes
If we decide to edit photographs taken with a reflex or digital camera, one of the first features we will use is the system to remove red eyes. On GIMP, removing red eyes is really very simple: we launch the program, then open the offending photo as seen above.
Once the photo is open, click on the Filters menu and open the entry Improved -> Red eye removal.
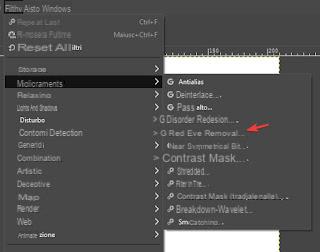
A small filter menu will appear, which we can ignore for now; let's go back to GIMP, adjust the zoom down so as to put the eyes to be corrected in the foreground.
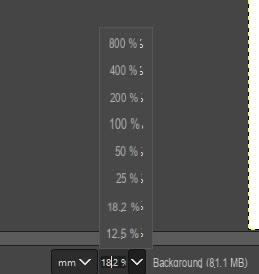
Now that the red eyes and pupils are in the foreground, let's use the tool Elliptical selection present in the toolbar to draw an ellipse around the eye; now all we have to do is open the filter window we saw earlier and click on OK. Automatically the red eye effect will be corrected, with a color gradient similar to the black of the pupil (which without zoom will not be noticed at all). We repeat the step for the other eye and save the corrected image as seen previously.
How to adjust the basic parameters (brightness, contrast, saturation)
Do we want to correct photographs with completely out of color and brightness?
Let's open the offending photo in GIMP, then use the various items in the menu Colors.
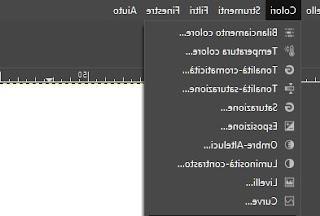
We recommend starting by adjusting the Color balance, then go to Saturation e Brightness and contrast. Each item will open a small configuration window, where we can apply various settings levels and observe, in real time, the effect it has on the photograph.
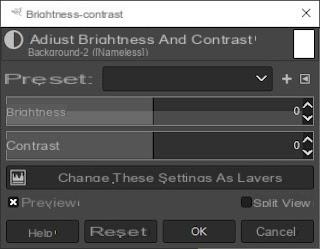
To better notice the differences between "before" and "after", we can also activate the voice Split view present in each window for setting the basic parameters.
How to rotate and resize an image or selection
Have we moved an image or a selection to another image but the aspect ratio is completely wrong?
To fix any problem right away, just use the tools Wheel e Ladder, always present in the side toolbar.
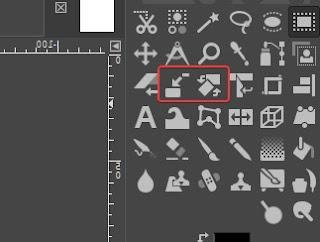
By selecting these tools after copying the selection, we will see a deformable field appear around it, so that we can rotate or change the aspect ratio of the image. Using the tool Wheel just rotate the cursor in the center to make the rotation while using the tool Ladder just click on one of the squares on the edges of the image to change its size and adapt it.
How to correct a blurry or blurred image
When we take photographs it can happen to have blurred or blurry photos. Assuming that the best results are obtained only by improving our shooting skills, to try to solve a blur or blur image problem just click on Filters -> Enhancement and use the plugins Antialias e Unsharp mask.
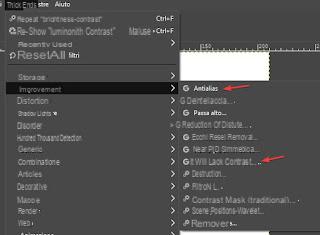
By increasing the level of antialiasing or applying a very accentuated artificial contrast we will be able, in the vast majority of cases, to soften the effects of a blurry or blurred photo. Obviously, we can't work miracles with every photo, so it's better to take good shots than to act later.
Conclusions
Even if GIMP is offered for free, it really has nothing to envy to expensive and noble programs, especially for home use: we really have all the necessary tools to be able to do photo editing in a more or less professional way, whatever the skill level. we own.
Still on the subject of photo editing, we invite you to read our guide on how Fix damaged photos with scratches or smudges after scanning them. Other photo editing programs for PC can be viewed in our article Top 20 programs for editing and managing images and photos.
How to use GIMP: complete guide


