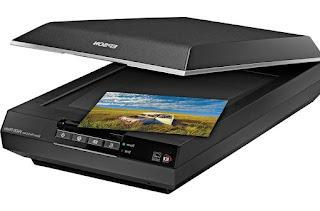
 The scanner is one of the most used input devices in the office, as the acquisition of paper documents is practically the order of the day.
Many scanners are supplied with printers, especially for home models, so as to provide printing, scanning and copying functions (the famous multifunction printers) in a single product.
If we have a new scanner or a new multifunction printer to connect to the PC with Windows operating system and we do not know how to do it, in this guide we will find all the steps to take to set up a scanner on Windows 10, Windows 8.1 and Windows 7.
After the configuration we will also show you the free programs that we can use on Windows to make the most of the new scanner, so you can scan documents but also photos, passport photos and so on.
How to set up the scanner on Windows 10
To install the new scanner on Windows 10, connect it to a free USB port or connect the multifunction printer to the WiFi or LAN network, so as to allow Windows 10 to automatically download the necessary drivers via Windows Update. If the procedure fails or the scanner cannot be installed automatically, retrieve the printer driver via Device management.
Right-click on the Start Menu icon at the bottom left, then select Device management and, on the unrecognized scanner icon (a yellow triangle will appear) right click and then select Property.
Now open the driver tab and select the item Update Driver to find a compatible driver.
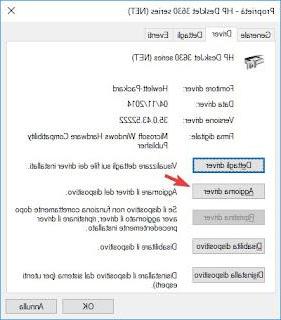
We select Automatically searches for an updated driver; after a few minutes the driver will be downloaded and installed.
Now that the driver is installed correctly we can add the scanner to the Windows 10 capture devices.
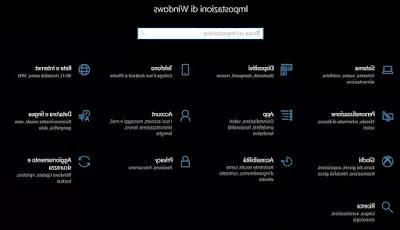
Let's open the menu Settings (just look for this item in the Start menu) then let's go in Devices -> Printers and Scanners; in this menu (if we do not see the scanner already active) we can add the scanner by clicking on Add a printer or scanner.
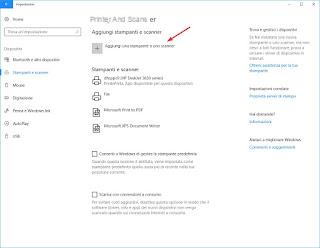
The search for printers and scanners connected to the PC or available via the internal network will start, we wait until the icon of the new printer appears, then click on Add.
Windows 10 will automatically configure the printer to be used by all programs that require its use.
How to set up the scanner on Windows 8.1
If we use Windows 8.1 as the operating system, the procedure for adding scanner drivers is identical to Windows 10; we open Device management (present in the context menu reachable with a right click on the Start Menu icon at the bottom left), then select the unrecognized scanner icon (a yellow triangle will appear) right click and then select Property.
Now open the driver tab and select the item Update Driver to find a compatible driver.
Now that the driver is added we can add the scanner by taking us to the desktop, opening the right sidebar (just move the mouse pointer to the right edge of the screen) and click Settings.
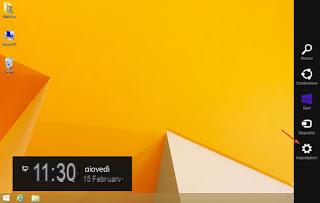
Let's click Change PC settings (bottom of the bar), then let's go to the menu PC and devices -> Devices.
We click on the button Add a device to search and add the scanner.
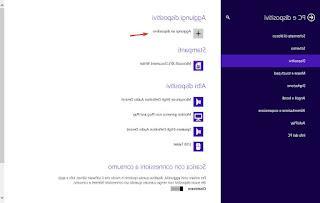
If the scanner does not appear or it is not possible to add it from this screen, we can open the old Control Panel to add it.
We open the right sidebar on the desktop again, click on Settings then on Control Panel.
In the new window we click on Add a device, under the category Hardware and sound.
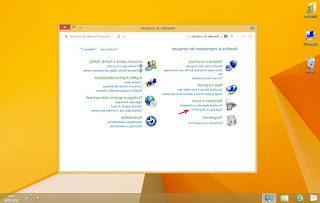
The search system for the displayable devices will start; we click on the scanner and as soon as it is visible to add it to the operating system.
How to set up the scanner on Windows 7
If we still use Windows 7 as an operating system we open the Start menu and search in the search bar Device management.
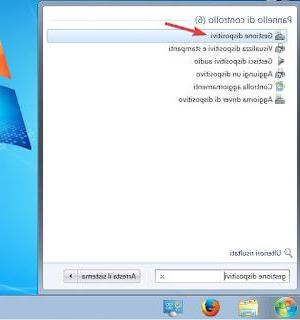
A menu similar to the one available for Windows 10 and Windows 8.1 will open, where the unrecognized scanner will be accompanied by a yellow triangle.
We right click on this icon and select Property, now open the driver tab and select the item Update Driver to find a compatible driver.
As soon as the driver is installed we open the Control Panel and click on Add a device, under the category Hardware and sound.
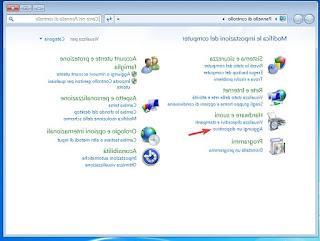
A new window will appear in which any new device to be added to Windows will be detected, including the new scanner.
As soon as it appears we click on NEXT to add it to the system.
Now that the scanner is set up, what programs can we use to take advantage of it?
In this part of the guide I will show you the programs and apps (for Windows 10 and 8.1) that we can use to scan documents or photos with the new scanner.
Windows Fax and Scan (10, 8.1 and 7)
The simplest program to scan with the new scanner is already integrated into all Windows still supported and is called Windows Fax and Scan; just search for it in the Start menu to open it.
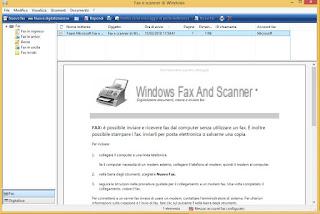
To perform a new scan, simply click on the button at the top left New digitization and choose the scanner from the available acquisition devices.
A new window will open in which we can choose the scanning profile, whether to scan in grayscale or color and adjust some scanner settings.
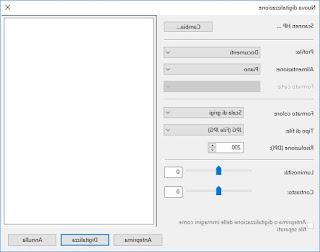
To preview the scan click on the button Preview, if instead we want to scan we click on the button Digitize.
Scanner (Windows 8.1 and 10)
Among the new apps available with the Windows 8.1 and Windows 10 operating systems there is also Scanner (o Scan); we can download it from the Windows Store or look for it in the Start menu (it is usually integrated into the system).
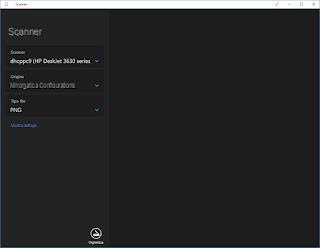
To use the app we select the scanner under Scanner, choose the type of file in the field of the same name and finally click on Digitize to start scanning.
ALSO READ: Best programs to use the Scanner with Windows PC
How to configure the scanner on Windows (10, 7, 8.1)


