 If we are looking for an alternative operating system to Windows 10 but which is still fast and easy to use on any computer (even those with a few years on their shoulders), it is advisable to immediately try a GNU / Linux distribution, so as to approach a world, that of open source, really complete and suitable for everyday use.
The most famous distribution is without a shadow of a doubt Ubuntu and, given that it could be difficult to move around in this system if we have never got our hands on Linux, in this guide we have decided to show you all the steps necessary to use Ubuntu immediately, without even giving up. out of the blue to Windows (better to act gradually).
At the end of the guide we will be able to install Ubuntu without any difficulty, even though we have never installed any operating systems before.
Ubuntu 21.04 guide
Simplicity will be the watchword of this guide: the times when using Linux was the stuff of geeks or computer enthusiasts are now a bad memory! In the following chapters we will show you what are the requirements to install Ubuntu, how to download the operating system, how to install it and how to perform the first system configuration.At the end we will find a chapter dedicated to the guides already present on the site, so as to be able to deepen the discussion and become more and more Linux experts.
Prerequisites
The requirements to be able to install Ubuntu on a computer are very light, allowing you to recover even old laptops or fixed PCs not able to support Windows 10; for Ubuntu in fact the following are required:- A processor of at least 2 GHz (better if multi-core)
- At least 2 GB of RAM
- At least 25 GB of free disk space
- Internet connection
For the actual installation, on the other hand, it is sufficient to obtain a USB stick of at least 8 GB (empty) and a computer to prepare it, so that we can install it on the PC we have chosen to install Ubuntu. If we don't have a key to use, we invite you to read our guide Best USB sticks to buy: the fastest, cheapest, biggest.
Download and preparation of USB key
Ubuntu 21.04 is a free operating system, so we can download it without having to get a user license or a product key. To download it, simply take us to the Ubuntu release site with any web browser (Chrome or Edge are fine) and press on the name of the latest version available, currently Ubuntu 21.04 LTS (Focal Fossa).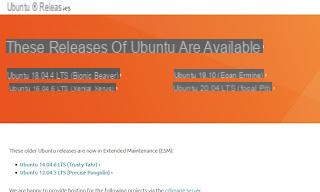
After pressing on the name of the version to download, make sure to press on 64-bit PC (AMD64) desktop image, in order to start the download of the operating system ISO image.
At the end of the download we download the Rufus program, available for any version of Windows, even portable (without installation).
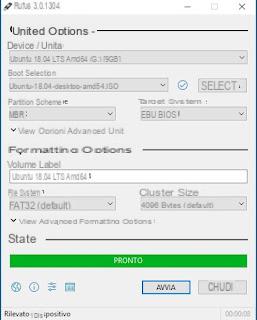
To create the Ubuntu installation key, connect the USB key to a port of the same name on the computer, start Rufus, select the USB key in the Device / Unit field, press the button SELECT, we select the ISO image just downloaded, we confirm the information already available (we just check that it is present MBR as Partition scheme) and press at the bottom of STARTS to start creation; after a few minutes we will have the key with which to install Ubuntu on our chosen PC to try the new operating system.
To learn more about the use of Rufus we can also read our guide Programs to burn ISO to USB.
Installation
To proceed with the actual installation of Ubuntu, connect the chosen computer to the Ethernet cable modem (Wi-Fi should be configured later, once the installation is complete), insert the newly created USB key into a USB port on the computer, start it and press repeatedly F8 or another specific key to change the boot order, as also seen in the guide How to change the boot order of the computer.Once you have entered the key, we wait for the installation screen to appear, where you just need to select the cittàn language and immediately press on Install Ubuntu.
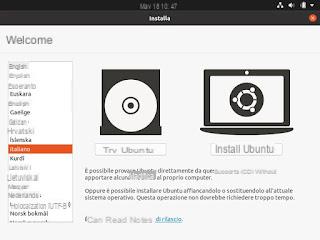
We confirm the layout of the cittàn keyboard, click on Next and make sure that the items are checked Normal installation, Download updates during Ubuntu installation e Install third-party software for graphics, Wi-Fi devices, and additional media formats.
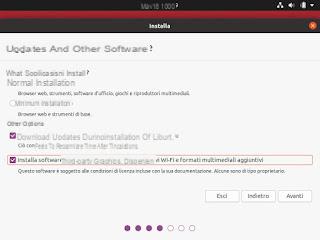
We press on NEXT, so as to immediately access one of the most important screens of this installation phase.
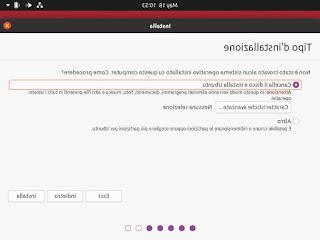
In this window we will see different options appear based on the PC we are configuring: for convenience we recommend that you always use the voice Erase disk and install Ubuntu, so as to erase every Windows operating system and use the whole disk for Ubuntu; but if we want to dual boot, we can also choose to install Ubuntu next to Windows, choosing the voice of the same name.
At the end of the choice, press the button Install to start the procedure; during the installation we will continue with the initial configuration by choosing the time zone, creating the user and choosing the access password for the system.
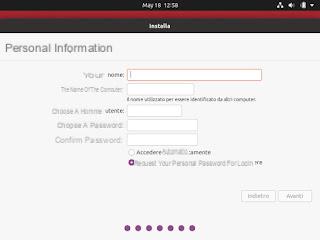
We then choose the username, enter the password and choose whether to automatically access the profile, by ticking or not the item Log in automatically.
From now on we won't have to do anything else, just wait for the installation process to finish (which can take a few more minutes to install updates and proprietary drivers).
At the end of the installation we restart the system and remove the USB key, thus being able to access Ubuntu already installed and ready to use; if we have opted for a dual boot system, upon reboot we will see a window for choosing between the two systems (Ubuntu and Windows).
Initial configuration
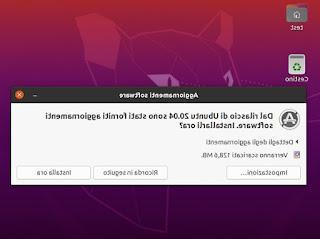
After starting Ubuntu from the disk we advise you to connect immediately via Wi-Fi, always if there is a wireless network card; to connect, press the network icon at the top right, select the wireless network and enter the access password.Once connected to the Internet, we wait a few seconds and carry out, if necessary, the updates requested by the system (which will automatically show a warning window every time Ubuntu needs to be updated).
To install new programs, press the Ubuntu Software icon on the left side and browse through the various categories, so as to immediately obtain the software we want to use on our new system.
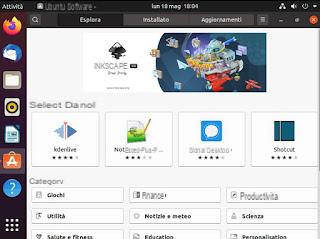
The pre-installed software is not lacking: in fact, we can immediately use Firefox, Thunderbird and LibreOffice to start and support other useful programs, such as those seen in the guide to Best programs for those who use Ubuntu instead of Windows.
All installed programs can be called up from the menu Show applicazioni, by clicking on the bottom left.
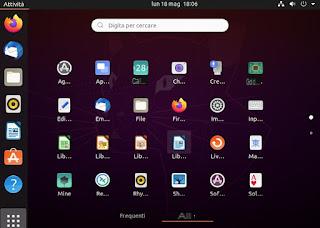
The open programs will be shown in the left sidebar and we can also decide to block on that bar by right clicking on the program icon and pressing on the item Add to Favorites. Personal files and folders are available in the app instead Fillet, similar to when seen on the Windows file manager.
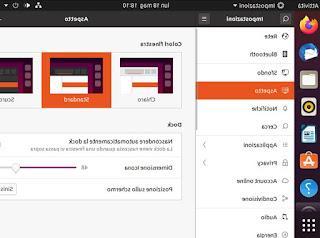
To customize and control every function of the system, just search and open the app Settings and browse through the various categories available.
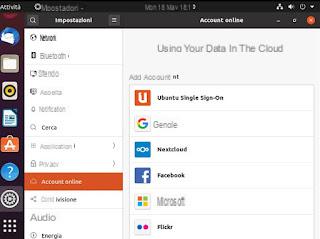
If, on the other hand, we wanted to access some online resources (such as files and folders stored in the Google cloud), all we have to do is take us to the Settings -> Online accounts path and add the accounts to be monitored on the system.
To learn more about the use and customization of this GNU / Linux distribution, we invite you to also read the Ubuntu Wiki, full of guides for every problem and every need.
Conclusions
With this guide we learned how to install Ubuntu and make the first configurations, so we can immediately surf the Internet and use the programs we were already used to using on Windows.However, in order to become a true Linux expert and become fully aware of the potential of an operating system like Ubuntu, we recommend that you read all the guides listed:
- How to turn GNU / Linux into Windows 10
- How to make a Linux PC the same as a Mac
- How to transfer files between Smartphone and Linux
- Linux directories: what are the main folders of each distribution
Ubuntu 21.04 guide: installation, configuration and use


