How to download Final Cut Pro X for free
Final Cut Pro X is really one of the best software out there when it comes tovideo editing: its strong point is represented by the use of avery simple graphical interface at the same time powerful, which allows you to express your creativity through a series of tools and features of great value.
The program is available for Macs with macOS 10.15.6 Catalina and later with at least 4 GB of RAM (but it is preferable to have at least 8 GB for any montages with more demanding resolutions, such as 4K), a video card with Apple Metal technology support (here you will find the list of compatible ones) and at least 3,8 GB of free disk space, to be able to install it. The fact that it is made by Apple specifically for macOS allows for optimized performance: it is in fact faster on average than other video editors on Mac.
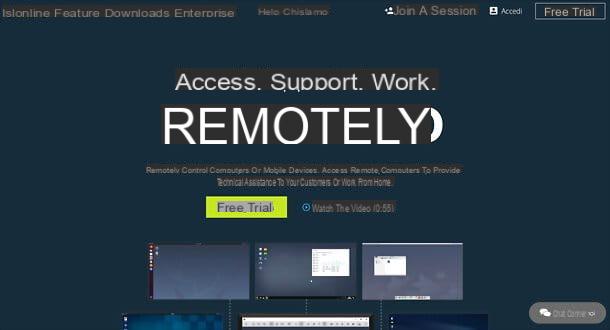
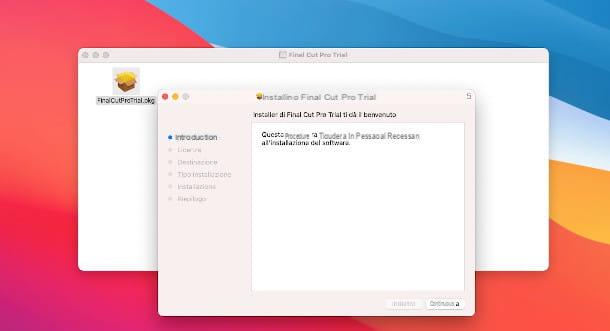
To download a free 90-day trial version of Final Cut Pro X (after which the software costs 329,99 euros, which can be purchased directly from the Mac App Store), linked to this page and click on the buttons Free Trial e Download now. So wait for the .dmg file of the program is downloaded and, at the end, double-click on it, then, in the window that opens, press twice on the .pkg file, to start the installation of Final Cut Pro X.
In the screen that appears, then press the button Continue, then click on the button Continue to accept the license and then press the button Agree to confirm. Now choose the target volume of the program among those available on your computer and click on the button Continue, then, in the following window, click on the button Install. Finally, enter the Administrator password and click on the button Install software.
Once the installation process is complete, click on the button Close. To start Final Cut Pro X, tap on Launchpad in the system tray (it's the icon with the colored squares) and click on its icon (a colorful director's clapperboard). Then press on the button OK, to start the trial version and access the main program interface.
How to use Final Cut Pro X

As anticipated in the previous chapter, the interface of Final Cut Pro X is particularly simple and intuitive, and it is an aspect of particular importance that is also of great support to understand how to use Final Cut Pro X.
Upon startup you will see a screen consisting of five areas well defined, in addition to the traditional text menu at the top. Starting from the left, the first panel, defined Event Library, allows you to navigate within the projects and functions made available by the software: at the top it is possible to select different types of elements among video (symbol of a clapperboard), audio (image of a note) e text (box with the letter T).
The next area, called Event browser, allows the loading useful elements for video editing: here, after importing, the videos, images and audio files to be edited will be present. To its left the viewer shows the monitor forpreview of the movie, with the underlying command barOf particular importance are those for starting and stopping reproduction and correcting colors.
The last area at the top in standard display mode is theInspector, where there are the adjustment and configuration parameters of clips, effects and various elements, which allows you to access different views based on the type of content you want to edit. The lower part, finally, is entirely occupied by the Timeline, in which it is possible to organize the timeline and compose the set of tracks and events that define the project.
Create a new project

The first essential step to get started using Final Cut Pro X is to create a new project: first, then, press on the menu Filletat the top left, then select the item Library from the latter. In the window that opens, immediately assign a name to the library by typing it in the field Save as, while in the menu below you can change the destination folder using the appropriate side arrows.
When done, press the button Save to complete the first step: you will notice that on the panel Event Library the relative library has been created with the first event inside, automatically selected and named with the current date. If you want to rename the event or library, click on the item and press the button Submit.
By selecting the event, the Event Browser provides the new button Import Media: By pressing it, you can select the contents to be used in editing. At the end, simply click on the button Import Selected, at the bottom right, to import the material into the library of the aforementioned event.
At this point you can logically organize the library by adding new events, by clicking with the right mouse button on theEvent Library and selecting the menu item New Event. Then you can import its contents in the same way as previously seen.

In the Timeline, at the bottom, you will also notice the presence of the button New Project: clicking on the latter will open a new window in which it is possible to assign a name to the project (Beauty Share) and select the reference event (In Event) among those created so far. Pressing on the button Use Custom Settings, further parameters will be shown that allow you to define the format resolution and rates of the video, the codec for rendering the movie and the audio format.
After defining the parameters in question, by clicking on the button OK the panel will be activated Timeline, to allow the import of the contents. To do this, I recommend that you proceed to dragging: click on an item in the Event Browser, to select it, then hold down the left mouse button and physically move it in the Timeline.
You will notice that the latter is characterized by a particular functionality of magnetism, which automatically hooks the element to the left side. You can easily remove it by clicking on the button Snapping: the latter shows the symbol of two rectangles and is located next to the icon of headphones to the right of the toolbar, in turn placed at the top of the Timeline.
Edit clips

Now you have all the contents arranged on the Timeline panel: the first operation is to edit clips, in order to eliminate unwanted parts and arrange the events in sequence. To do this, a series of tools are made available that can be easily recalled by clicking on the button with the arrow symbol present to the left of the top bar of the Timeline panel.
By clicking on the first tool, Select (the one with the arrow set by default), it is possible, for example, to select the single element within the Timeline to isolate it from the others: you will notice that a yellow frame and the panel Inspector at the top right will show only the relative parameters, based on the type of content (video, image o audio).
Furthermore, through the aforementioned tool you can move the individual elements, in order to change o reverse the position according to your needs: just click on the content and, holding down the left mouse button, drag it to the point you prefer.
Another extremely useful feature is that offered by the named tool Blade, easily identifiable as it shows the symbol of a razor blade. After clicking on it, the cursor will take on the shape of a razor blade and by clicking on any point of a clip this will be divided in two parts: it becomes possible to promptly intervene on the single element to move or delete it (in this case you can proceed by pressing the key backspace keyboard).
It is possible at any time to monitor the mounting of the clips by pressing the ▶ ︎ button on the lower bar of the panel Monitor: You will see that the yellow cursor in the Timeline will start to advance and you will be able to preview your work in the central window.

Always remaining in the panel Monitor, here are some features that are particularly useful for video editing. By clicking on the first icon located at the bottom left in the aforementioned area, in the shape of rectangle, select the mode Transform from the menu that appears. You will see that the Monitor window will be delimited by a series of dots, useful for manually redefining the frame size o rotate the image. You will also notice the appearance of an additional point in the center of the image.
For example, by clicking on one of the dots in the corner and dragging the mouse cursor while holding down the left button towards the inside of the window, it will shrink. Acting, on the other hand, on the central dot and performing the same operation (this time upwards or downwards), one intervenes on the clip rotation.
Using the icon following the one just exposed, which shows the symbol of a Magic wand, it is possible to intervene on colors: after clicking it, click on the option Balance Color and you will get an automatic color balance. By clicking on the item Color Inspector instead you will be shown, in the Inspector panel, a window through which it is possible change the chromatic characteristics of the clip, acting on the tone (Color), on the saturation (Saturation) and onexposure (Exposure).
The next button in the shape of hoops finally, it allows to modify the speed of the clip: by clicking on it a menu will appear whose first items, Slow e Fast, respectively, allow you to slow down and speed up the video by selecting one of the proposed parameters. However, consider that this method is not applicable to all formats.

Would you like to apply effects and transitions to your editing? Final Cut Pro X offers a multitude of very creative and interesting possibilities. To access the effects click on the penultimate button with two overlapping rectangles to the right of the top bar of the Timeline panel: a box will open containing all those available, divided by categories in a special list on the left.
Once the preset to your liking, all you have to do is drag it (in the same way as previously seen with other elements) inside the clip on which you want to apply it.
To load the transitionsinstead, click on the last button (the one with the symbol of two adjacent triangles): the operation is the same as just seen for the effects, with the difference that, after dragging the element inside the clip, you can also modify its duration acting on the edges of the same to make it smaller or longer. At the same time, moreover, the Inspector panel will show the various editable parameters, which change according to the selected transition.
Add 3D titles and texts

If you wish add 3D titles and texts, Final Cut Pro X offers a wide range of presets, easily recalled by clicking on the appropriate button at the top left, whose symbol is a box inside which there is the letter "T".
In the panel Event Library you can then choose the category reference, while in the box Event Browser you will see the available effects. To add one to your montage, click on the desired element, then drag it to a free space above the already imported clips if you want to overlay it on the images, otherwise insert it into the video as an additional element in its own right.
First, define the duration of the newly created event by clicking on one of the side edges element (it will be highlighted in yellow): holding down the left mouse button you can move it to the right or left to change its extension.
After selecting the track in question you will see that in the Inspector panel, as for the effects and transitions, the relative parameters will be made available, with different possibilities of editing according to the one chosen. In all cases, however, you can type the desired text in the field Text and act on the fields for the definition of the type of font and font size.
The first field at the top also allows you to choose the style, which by default is set to Normal. Clicking on it will show the items 2D Styles e 3D Styles: passing over the latter with the mouse pointer, the menu will provide the various stylistic options, easily selectable.
Manage audio

On Final Cut Pro X it is also possible manage audio particularly effectively. If you want to intervene onembedded audio within a clip, you must first view it separately from the video: double-click on the clip and you will see that an additional track will be generated below the one you just selected.
In this way, however, it is not yet possible to work it separately: to do it, click on it with the right mouse button and select the item Detach Audio from the menu that opens. Now you can manage the audio track independently, as it is no longer linked to its original video track, and possibly delete it in case you want, for example, to add external audio or background music to make them two sound sources do not overlap.
If you want to do a fade in or fade out, which is an effect of fade in or out of the audio, you will notice that at the ends of the track in question there is a dot. Hovering over it with the cursor, you will see two arrows to the right or left. By clicking on it and holding down the left mouse button, you can move the mouse to the point where you want the effect in question to start or end (depending on whether you are entering or exiting). You will see an arc line that identifies the application of the effect in question.
equalize the audio, on the other hand, after selecting the track to be modified, if the sound is incorporated into the video, press the icon of thespeaker present at the top, on the left side of the Inspector panel. If the track is audio only, however, the parameters in question will be automatically shown in the aforementioned area.
In the Inspector window, therefore, you can easily act on the volume using the appropriate selector to increase or decrease its value. By clicking on the box next to the wording Equalizationinstead, the audio equalization is activated and to the right of the latter there is a menu through which it is possible to select audio presets: default is set Flat, but clicking on it will show alternatives. The button to its left, on the other hand, opens a panel of graphic equalization for more experienced users, which allows you to promptly intervene on the various sound characteristics.
Export a video

Your first project is complete: now let's see how it's possible export a video from Final Cut Pro X. First, however, I also want to inform you about this program saving occurs automatically. You can, therefore, easily recall your projects and continue working on them at any time, by clicking on the relevant box under the section Project of the Event Browser.
For the final export you have to press the button at the top right that shows the symbol of a square and an arrow pointing up. From the context menu that appears, select the item Master File and in the window that opens, if you have special setting needs, click on the tab Settings: here you can choose to select a different format (Size) or Video codec among those proposed in the drop-down menus next to the related captions.
Then click the button Next, to continue, then choose the destinazione of the file and press the button Save, bottom right. Finally, wait for the video to be processed, which will be notified to you by a specific application message.
How to use Final Cut Pro X


