How Time Machine Backup Works
time Machine it is certainly one of the most functional utilities of macOS: it really takes two clicks to configure it and have a backup of the data (all or part of it) on the Mac, including installed programs and settings, to be restored every time you have them need. Before showing you how to do it, however, I would like to tell you a few words about how Time Machine works in detail and how it efficiently manages disk space.
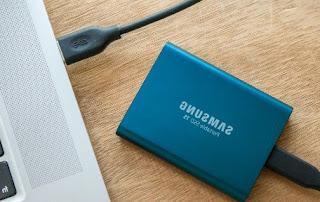
Time Machine, first and foremost, needs a external hard disk large enough to store data, which can be connected via USB, Thunderbolt or FireWire ports or via local network, for example via a NAS. Alternatively, one can also be used AirPort Time Capsule, an Apple-made router that also integrates a hard drive for Time Machine backups inside, or an AirPort Extreme router connected to an external USB drive.
After completing the first, very simple setup (which I'll show you later in this guide), Time Machine automatically creates a full backup (or “local snapshot”) of all data on your computer - this can take a long time, depending on the amount of files, folders, and programs on your Mac disk.
Once this phase is complete, Time Machine fully automatically checks the files created, modified or deleted, the new settings and the new programs installed, and updates the backup on the external disk using the "rules" that I show you below.
- Backup hour by hour - file changes are checked every hour and, once the check is finished, Time Machine saves only the modified files, copying them to a new folder (eg Year-Month-Day-Hour: Minute) on the backup disk. For files that have remained unchanged, a simple collegamento to files already present in the full backup. The "time" folder remains saved on the disk for the next 24 hours.
- Day-to-day backup - once a day, the current state of the files is “compared” with the last hourly backup created. Once this operation is completed, Time Machine takes care, as seen above, of copying only the modified files in a special folder on the backup disk, creating links for those that have remained unchanged. The “daily” folder is kept for a whole month.
- Weekly backup - with a similar criterion, and sufficient disk space, Time Machine can create weekly folders to "speed up" any recovery operations.
The backup operation is performed completely automatically if the external disk remains connected; if instead the backup disk is disconnected, Time Machine takes care of updating it as soon as it is reconnected to the Mac. In case of insufficient space, the program displays a warning message and automatically deletes the oldest backups.
The ease of use of Time Machine is achieved thanks to this particular mechanism of copies and links: as you will discover shortly, you can access the "previous" versions of the files, and save them at any time, within a couple of clicks , thanks to a “special” version of the Finder included in the program itself.
Create a backup with Time Machine

Now that you understand Time Machine fully, it's time to learn how to use this invaluable utility properly. The first thing you need to do is get yourself a external hard disk large enough (at least equal to the size of your Mac's main disk) to comfortably hold your backups. How do you say? Have no idea which one to choose? Don't worry, in my guide to the best external hard drives you will surely find what is right for you.
Once you have chosen the most suitable disk, the first thing you need to do is connect it to your computer; if it is initialized correctly, therefore already able to host backups created with Time Machine, macOS will show a warning window that will ask you how you intend to operate, offering you the options Decide later (to review the warning window when the disk will be disconnected and reconnected), Do not use (not to use the disc as a backup device) or Use as a backup disk.
To immediately make a full backup with Time Machine, click on the last option mentioned: once you get the confirmation, the program will take care of copying all the files, settings and applications on the Mac. The saving operation, as you I have already explained, it is repeated once every hour if the disk remains connected to the system, otherwise macOS updates the backups completely automatically, the next time the disk is connected.

If the disk is not compatible "immediately" with the Time Machine backup, you must initialize it (ie format it) as follows: start theDisk Utility from the folder Other of the Launchpad (the rocket-shaped icon located in the Dock), select the disk you want to format from the left sidebar, click the button Initialize, set in the drop-down menu format the voice Mac OS extended (journaled), give your disk a name by typing it in the field Your name and finally click the button Initialize. Once the initialization procedure is complete, macOS will show you the warning window seen previously.
If for some reason the automatic configuration options do not appear, click on the icon System preference placed on the Dock and then on the icon Time Machine. In the new window that opens, set the check mark to Back up automatically, select the backup disk from the panel that appears, click on the button Use the disc and finally, put the check mark on the box Show Time Machine in the menu bar.

If you want to exclude from automatic backups files or folders that you consider useless, click on the Time Machine icon located in the top bar of macOS, select the item Open Time Machine preferences from the small menu that is shown on the screen, click on the button options and then on the button + to exclude the desired items. Always from the window Time Machine Preferences, you can add or delete backup disks by pressing the button Choose disk.
Remember that, to optimize the space available on the backup disk, Time Machine automatically deletes the “oldest” backups. You can view the status of Time Machine at any time (operations in progress, next backup, etc.) by clicking on the icon located in the menu bar.

If you need more information about the backup procedures described above, I invite you to consult my guide on how to make a backup with Time Machine.
Restore a Time Machine backup
As I have already explained to you previously, you have two methods to use backups created with Time Machine: the first is useful for restoring previous versions of a file, for example to undo changes made by mistake, the second instead serves to restore the Mac disk in the event of a "disaster", ie damage to the operating system or replacement of the disk.
File recovery

How Time Machine works to restore the previous version of a file or folder? Nothing could be simpler: click on the program icon in the macOS menu bar, select the item Enter Time Machine from the proposed menu and, from the screen (very attractive) that opens, use the special window of Finder to select the file or folder you are interested in, then choose the backup to restore using the time bar located to the right of the window.
Once you have chosen the version of the file or folder you want to bring "back to life", right click on it, select the item Reset [name] to from the context menu and choose the folder in which to save: you can repeat the operation as many times as you want and for any file saved on your computer.
If you want, you can delete previous backups of a file by calling the context menu and selecting Delete all backups of [name]. To exit Time Machine, press the button Cancel located below the Finder window.
System recovery

If the situation is more serious and you need to restore all the backup files, perhaps after formatting the Mac, first you need to access the recovery menu operating system. To do this, connect the disk containing the backup to your computer, click on the icon apple located in the upper left corner of the screen, select the item Restart ... from the menu that appears and, as soon as the computer restarts, press and hold the keys cmd ed r on the keyboard.
Arrived at this stage, wait for the Apple logo to appear with a loading bar, release the keys, click on the item Use in your languagen as your primary language in the screen that appears and, finally, press on arrow placed at the bottom, in the center.
At this point, all you have to do is "instruct" the system on what and where to restore: click on the item Restore from Time Machine backup, then twice on the button Continue, choose the disk on which the backup is saved, press again on Continue, select the date to restore data to (remember that, by selecting a date "prior" to the most recent backup, all files, folders and programs saved after that date will be deleted), click once again on the button Continue, choose the system disk (the one on which macOS is installed) and, finally, press the button Restore to start the process, which could take more or less time (depending on the size of the data on which you need to intervene).
If any steps are not clear to you, or if you need further clarification on restoring your Mac from a Time Machine backup, I suggest you take a look at my guide on how to restore Mac, in which I have covered the topic in more depth. .
How Time Machine works


