Did you accidentally delete some very important files that you had on your PC or smartphone? It happens to everyone, don't worry, anyway know that the last word hasn't been said yet. If the portion of memory on which the files were hosted has not yet been overwritten by other data, you can still hope for their recovery.
There are some software, even free of charge, that allows you to scan any type of drive (mechanical hard drives, SSDs, microSDs, USB sticks, etc.) and recover files that have been deleted from them. Obviously, these are not miraculous products: if the portions of memory on which the files were stored were occupied by other data, there is nothing to do, except go to specialized centers, but we will have the opportunity to talk about this on other occasions.
For the moment let's focus on the programs to recover deleted files and try to find out which one is the most suitable for you. There are really something for all tastes and needs. Whether you have a Windows PC, a Mac, a computer equipped with Linux or a smartphone/tablet of any brand, you are sure to find something that suits you. Have a good read and good luck recovering your data!
EaseUS Data Recovery Wizard (Windows/macOS)
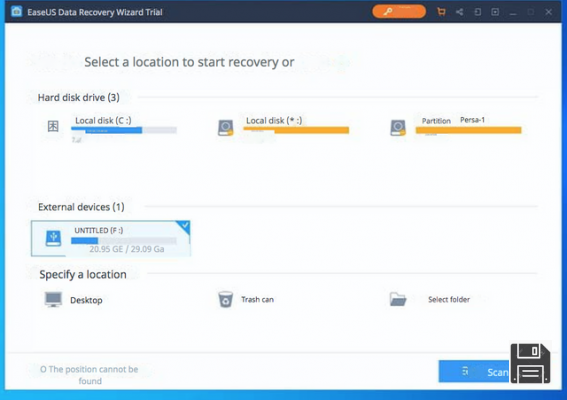
EaseUS Data Recovery Wizard is one of the best deleted file recovery programs available for Windows and MacOS. It supports many different types of files (from photos to videos, Office documents to compressed archives, not to mention emails and much more) and allows you to operate on any type of drives: hard drives, SSDs, memory cards, USB flash drives, cameras, smartphones, tablets and other storage devices.
What distinguishes EaseUS software, there is also an extremely intuitive user interface (fully translated into English) and the ability to recover files even in critical conditions, such as after malware infections, system crashes or formatting/deleting a partition.
EaseUS Data Recovery Wizard is available in two versions: EaseUS Data Recovery Wizard Free, which is free and allows you to recover up to 500MB of data (2GB, if you share the program online), and EaseUS Data Recovery Wizard Professional, with prices starting from 66.69 Euros, which allows you to recover data without any limits.
To download EaseUS Data Recovery Wizard Professional on Windows, connect to the EaseUS website and click the Free trial button: the software download is free, however if you do not activate your copy by purchasing a license, you will only see which files to recover and you will not be able to export them. To download, instead, EaseUS Data Recovery Wizard Free and thus have the possibility to recover up to 2GB of data for free, you need to connect to this other page of the EaseUS website and click on the Download Free button.
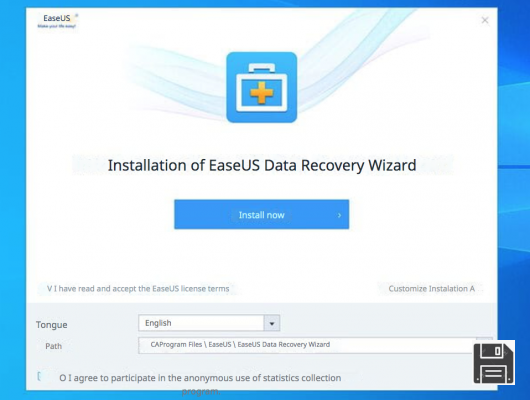
When the download is complete, regardless of the downloaded version of the program, open the obtained .exe file and answer Yes to the warning that appears on the screen. Then make sure that the EaseUS license conditions box (bottom left) is checked and press the Install now button to start downloading and installing all the components needed for the software to work. If you do not want to send anonymous usage statistics, click on Customize installation (bottom right) and uncheck the appropriate box.
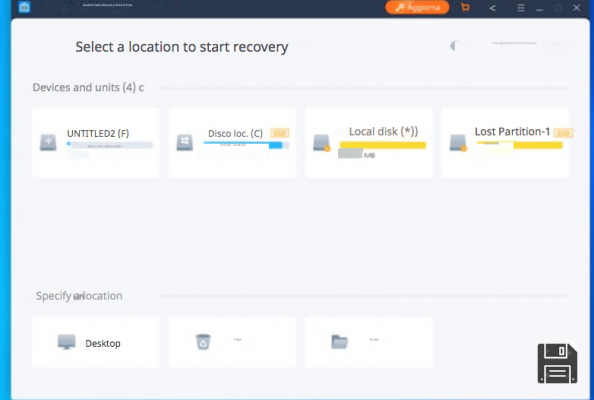
When setup is complete, click the Start Now button to close the window and start the EaseUS Data Recovery Wizard. Then select the drive icon that contains the files you want to recover and start scanning them by clicking the Scan button located at the bottom right.
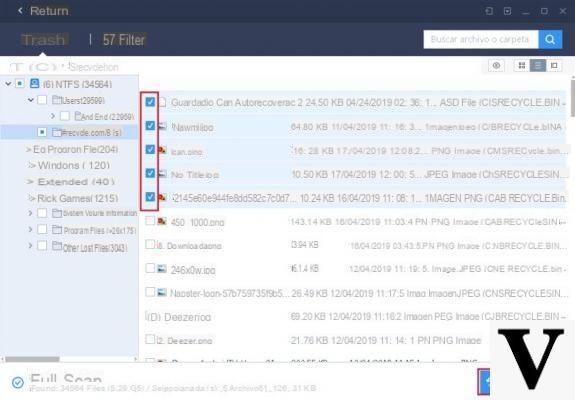
Once the search results appear, "browse" the folders where the program has found files to recover, using the left sidebar and, if you think it is appropriate, use the Filter option (top) to limit the search results to certain file types only (e.g. Graphs, Documents, Video, Audio, Email, etc.).
Once you have found the files to restore, select them (by ticking the boxes related to them) and click on the Recover button, at the bottom right, to indicate the folder where to save them. If, before saving a file, you want to preview it, click on the eye icon in the upper right corner.

Do you use a Mac? Then know that you can download EaseUS Data Recovery Wizard using the links I provided earlier and clicking on the Mac version of the program. When the download is complete, open the obtained .dmg package and drag the EaseUS Data Recovery Wizard icon into the Applications folder of your computer to install the software. Simple, right?
PhotoRec and TestDisk (Windows/macOS/Linux)

PhotoRec and TestDisk are two data recovery software, both free and open source, which are provided in pairs. The first one is a very easy to use data recovery software that supports all major file systems and all storage drives (hard drives, SSDs, microSDs, USB devices etc.); the second one is also a data recovery software but only works as a command line and is especially suitable in situations where you want to recover lost partitions or want to make bootable drives that are no longer bootable.
The two software are multi-platform. This means that they work on Windows, macOS and Linux, but unfortunately PhotoRec comes with a ready-to-use graphical interface only in its Windows version. On macOS and Linux it should be used from the command line.
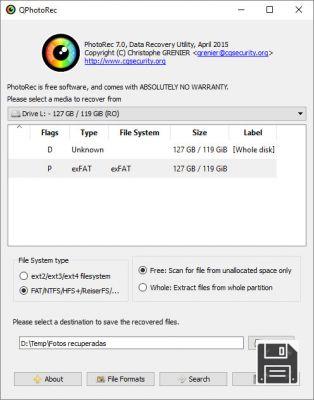
Having made these necessary clarifications, let's see in more detail how PhotoRec works (the program that, between the two, I suggest you to try). After you download the software and extract it into a folder of your choice (it doesn't require installation to work), start the executable qphotorec_win.exe.
In the window that opens, use the drop down menu located at the top to choose the drive from which to recover data, then select its primary partition (or the partition from which you want to recover deleted files) and press the Browse button, to select the folder where you want to save the data recovered by the program.
At this point, put a check mark next to Whole, click on File Formats button, to select the file types to recover and press Search, to start data recovery. All the files found by PhotoRec will be automatically saved in the folder you indicated by clicking the "Browse" button.
For more information about PhotoRec and how it works, see my tutorials on how to recover deleted files from mobile phone where I explained how to use the program to recover data from hard disk and microSD.
Recover (Windows)

Recuva is one of the most used programs to recover deleted files in the Windows environment. It is free of charge and is available in two versions: a "traditional" one that has a standard installation procedure (and offers the download of additional software, such as CCleaner, which is made by the same manufacturer) and a portable one that you can use without carrying out installation procedures. The program supports all devices: mechanical hard disks, SSD, microSD, smartphones, tablets, MP3 players, USB sticks etc. and all file systems and is extremely easy to use. It allows you to choose, through a convenient wizard, the types of files to recover and the drives to scan.
To go into more detail, after starting Recuva you have to click the Next button and choose the file types to recover: all files, images, music, documents, videos, compressed files or emails. Next, you have to choose whether you want to recover data from all the drives connected to your PC (choosing the option I am not sure), from multimedia card or iPod, from the document folder, trash can, CD/DVD or from a specific location to be indicated by the appropriate button.
Once you've passed this step, press the Next and Start buttons and wait for the list of recoverable files to show you. The files marked with green dot are those that can be recovered 100%, those marked with yellow dot can be recovered but are probably damaged, while those with red dot next to them cannot be recovered. Once you select the files to restore, click on the Recover button, select the folder to export them to and you are done.
If the normal scan does not return satisfactory results, you can try to activate the deep scan by selecting the appropriate item in the initial Recuva procedure. For more info take a look at my tutorial on how to recover deleted files from the recycle bin where I told you more about the software.
Disk Drill (Windows/macOS)

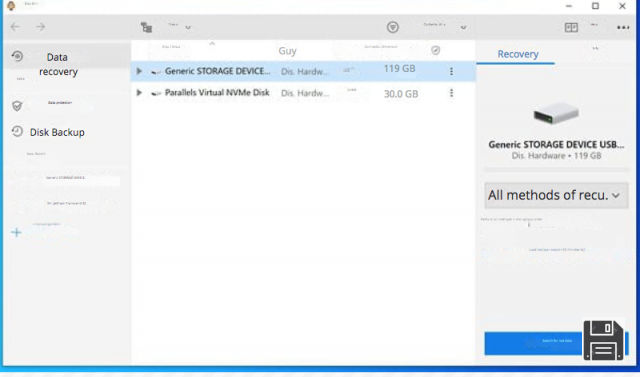
Disk Drill is one of the best data recovery applications available on Mac. Unfortunately it is not free, it costs 79 Euros, but you can download it for free and test its features (meaning that it displays the files that you can recover but cannot export). There is also a version of the software for Windows, but personally on Microsoft systems I tend to recommend other solutions like the ones we analyzed earlier.
The operation of Disk Drill is quite intuitive. After starting the program, remove the tick from all the options that are proposed to you, click on the Continue button and type the MacOS administration password. Then click on the Recover button which is located next to the drive name from which you want to recover deleted files and wait for the scan to be completed.
At this point, select the type of files you want to recover (e.g. Documents, Pictures or Videos) and browse the list of all the files that Disk Drill was able to find. To preview the files, click on the eye icon next to their names.
For more detailed instructions on how Disk Drill works, see my tutorial on recovering data from corrupted hard drives in which I have taken a thorough look at the program.
MiniTool Power Data Recovery (Windows/macOS)

Another data recovery software that is definitely worth considering is MiniTool Power Data Recovery, which is compatible with both Windows and MacOS. It is available in two versions: a free version that allows you to recover up to 1GB of data and a paid version ($69, for personal use only) that has no such limitations.
The program is really very intuitive. On its home screen there are five options: Undelete recovery, to recover deleted files; Lost partition recovery, to recover lost partitions; Digital media recovery, to recover photos and videos from external drives; CD/DVD Recovery, to recover data from corrupted floppy disk drives and Damaged partition recovery, to recover data from damaged partitions.
After scanning the drive from which you want to recover data, to restore the files, just put a check mark next to their icons, press the Save button and choose a folder to export them to.
Note the availability of a bootable version of MiniTool Power Data Recovery that you can copy to a floppy disk or USB stick and use on those systems that no longer boot properly.
DiskDigger (Android)

If you need to recover deleted files from an Android smartphone or tablet, you can rely onDiskDigger: it is a data recovery application that works directly from Android and allows you to restore deleted files from both the device memory and microSD (in the case of devices that support memory expansion). It is available in two versions: a free one that allows you to recover only images in JPG and PNG format and videos in MP4 format and a paid one (3.37 euros) that also allows you to restore documents, applications, compressed archives and music tracks. In both cases, for the application to work correctly, you need to root on Android.
After downloading DiskDigger to your device, give it root permissions by pressing the appropriate button in the middle of the screen and refuse to switch to the Pro version of the application (if you are using the free one). At this point, choose to scan your device's internal memory or microSD, put a checkmark next to the file types you want to restore and press OK to start scanning the drive.
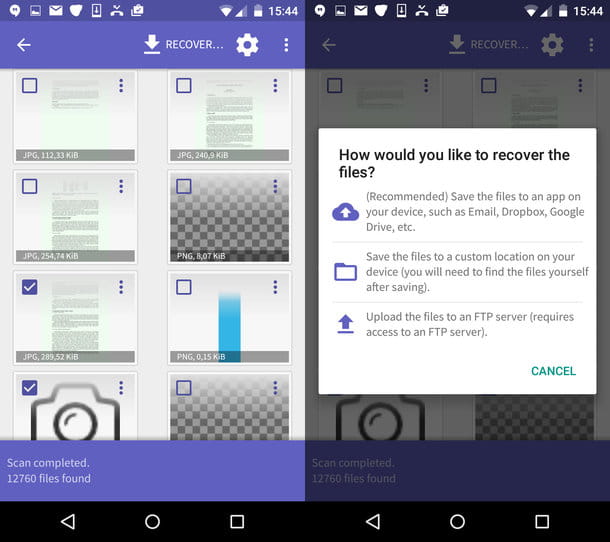
When scanning is complete, select the files to recover, press the Recover button at the top and choose whether to export the items to a cloud storage service, whether to send them to yourself via email or to store them on the smartphone/tablet memory (not recommended). If you need more info on how DiskDigger works.


