Immediately after formatting your computer, do you remember that you have not saved any important data that you had on your hard drive? Have you mistakenly deleted all the contents of the external hard disk connected to the PC on which important files were stored and are you desperate? Don't worry, maybe all is not lost. If the areas on the drive where the files you forgot to copy were stored were not overwritten by other data, you may be able to recover everything (or almost everything) even after formatting.
To do this, you just need to use some programs specifically designed for the purpose in question: these are software compatible with both Windows and MacOS (as well as Linux) that can be used both for free and for a fee. Contrary to what you might think, they are quite simple to use and do not require any special technical knowledge. The only basic requirement, if we want to define it that way, is to have a minimum of patience in waiting for the chosen software to finish scanning the disk (which could go on for quite a while, depending on its capacity and the elements that were present on it) and then proceed by going to recover the deleted files after formatting.
So? What do you say we finally put the chatter to one side and start getting started immediately? Yeah? Great! Sit back nice and comfortable in front of your trusty computer and start focusing on reading the following. I'm sure everything will work out just fine and you'll be happy and satisfied with what you've learned. What do you say, shall we bet?
Useful information and recommendations
Before explaining what tools you can use to recover deleted files after formatting a hard drive, I would like to make a few clarifications about this.
First of all, taking into account that as mentioned at the beginning of this guide, recovery of files that were present on a formatted drive is only feasible in case the areas where the files to be recovered were "hosted" have not yet been overwritten by other data, in order to increase the chances of being able to access what you are interested in again, it is crucial to minimize the usage of the drive being recovered.
So, if you need to recover data from your computer's internal hard drive, I suggest you to download the useful software for this purpose to a different computer, copy it to a USB flash drive or other external drive and boot it directly from there. As far as external hard drives are concerned, the program can also be downloaded to the computer to which the drive is connected, no problem.
Recover deleted files after formatting on computer
Having done the above mentioned clarifications, I would say that you are finally ready to take action and then go to find out, in concrete terms, what tools you have on your side to try to recover files deleted from the hard disk after formatting: you will find indicated and explained below those that, in my opinion, represent the most effective in the category.
PhotoRec (Windows/macOS/Linux)
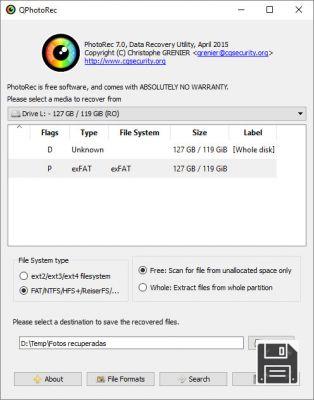
Have you ever heard of PhotoRec? No. Have you ever heard of PhotoRec? No problem, let's fix it right away: it is a free and open source program that can recover deleted files. To be precise, it allows you to recover all kinds of files (at the expense of the name) deleted from hard drives, USB sticks, memory cards and various other media and you can use it through a convenient graphical interface (only on Windows, i.e. the version I focused on in this step, on macOS and Linux it works exclusively from the command line).
To download PhotoRec and TestDisk to your computer, connect to the program's website and click the link for the operating system you are using (e.g. Windows 64-bit for 64-bit Windows and Mac OS X Intel for macOS).
When the download is complete, extract the ZIP archive you just obtained into any folder, start the qphotorec_win.exe executable contained within it and click Yes. In the program window that you are shown on the screen at this point, select, from the drop-down menu at the top, the disk from which you want to recover the files.
Then select the item related to the main partition of the chosen drive (e.g., "Open"). NTFS, FAT32 or exFAT), check the box next to FAT/NTFS/HFS+/ReiserFS/ or the ext2/ext3/ext4 file system (depending on the file system the drive is formatted with) and choose an option between Free: search for documents only in unallocated space or Full: Extract documents from the entire partition (depends if you need to search for deleted files in the unallocated space of a drive that still works properly or if you need to treat a damaged drive and therefore want to recover data from the entire partition).
Finally, click the File Formats button (below) and indicate the file types you are interested in recovering with PhotoRec, click the Browse button to indicate the folder where you want to save the data once recovered and press the Search button to start the analysis and recovery procedure of the selected drive.
EaseUS Data Recovery (Windows/macOS)

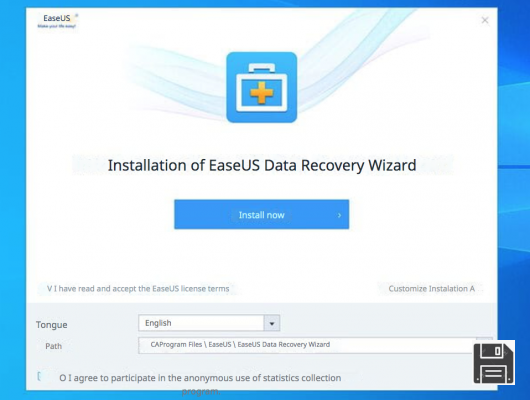
If you haven't had any particular luck with the program mentioned in the previous step, you can try to recover your deleted files after formatting with EaseUS Data Recovery - it is a free software available for both Windows and MacOS, which offers the possibility to recover images, videos, documents and anything else from hard drives, pendrives, SD cards and various other media. Note that it allows you to recover a maximum of 2 GB of data, after which you need to upgrade to the paid version (81.36 euros).
To download the software on a Windows PC, connect to its official website and press the Download Free button. When the download is complete, open the obtained .exe file and, in the window that appears on your desktop, click on the Yes and OK buttons. Then press the Next, Accept, Confirm and Install buttons and finish the setup by clicking the Complete button.
If you are using a Mac, connect to the MacOS version section of the program's website and click the Free trial button. When the download is complete, open the resulting .dmg package, drag and drop the software icon into the MacOS Applications folder, right-click on it and select Open twice in a row to start EaseUS Data Recovery, bypassing Apple's limitations to applications from non-certified developers (this is done only the first time you start it).
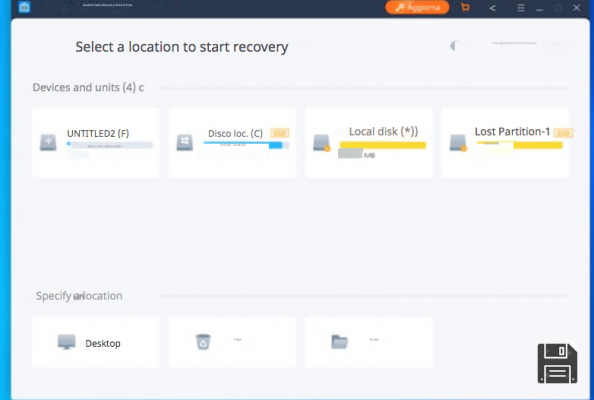
At this point, select, through the EaseUS Data Recovery window displayed on the screen, the drive you wish to recover and start the disk analysis procedure by clicking on the Scan button (bottom right).
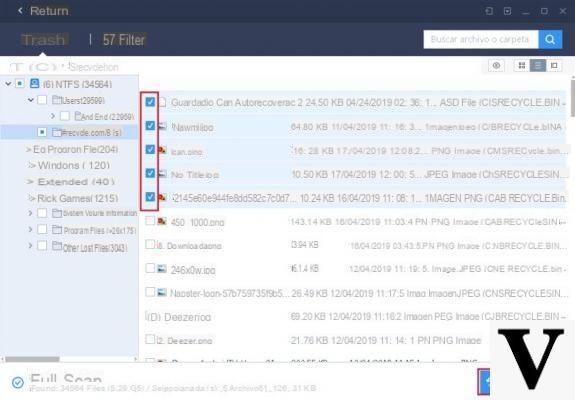
When the scan is finished, you will be shown the complete list of all the files that the program was able to locate. If you want, you can filter them by type by clicking on the Filter item at the top and selecting the category of files you are interested in (graphics, documents, videos, etc.). Instead, to see a preview of specific items, select them from the list and then click the button with the eye in the top right corner.
To finish, select the files that you want to recover by checking the box next to their names and press the Recover button (bottom right corner). Then indicate the location on your computer where you want to save the files and press Well. When the recovery process is complete, the File Explorer window for the location you chose to save the files will automatically open.
Recuva (Windows)

Another useful tool for the purpose that I invite you to try out is Recuva, a totally free program specific for Windows operating systems thanks to which you can recover photos, documents, videos and many other types of files deleted erroneously or as a result of crashes, viruses and other problems with your computer. It was developed by the same software house as CCleaner and is incredibly easy to use.
To download Recuva to your PC, go to the program's website and click on the CCleaner.com link under Recuva Free. If the download does not start automatically, click the Start Download button to force it.
Then, open the obtained .exe file and, in the window that appears on the desktop, select the language from the drop-down menu for language selection (top right), then tick the box for the installation of additional non-essential programs (bottom left) and click the Install button.
Now that you see the window of the software on your desktop, click on the Next button and put a check mark next to the item related to the type of files you want to recover. If you want to see the complete list of all the files that were present on the hard drive and that can be recovered, just leave the check on All files. Next, click the Next button.
At this point, select the In a specific location and set the drive C: (or the drive letter from which you want to recover files) in the field below, after clicking the adjacent Browse button. Then click the Next and Start buttons, wait for the list of recoverable items to appear, and tick the items you want to recover. To finish, click the Recover button, select the output folder and you're done.
Keep in mind that the files that can be recovered without problems are those with the green circle, while those with the yellow circle are partially damaged and those with the red circle are completely (or almost completely) damaged.
Please note that if you need to, before recovering specific files you can preview them by clicking the Switch to Advanced Site Mode button at the top right of the program window and selecting the files you are interested in.
Also, if among the files found by Recuva you cannot find the ones you wanted to recover, before starting the recovery procedure you can tick the box next to Enable deep scan to perform a deeper scan of the hard drive.
Recover deleted files after formatting on smartphones and tablets
The recovery of deleted files after formatting is an operation that you can also try to perform on smartphones and tablets, always using some special programs or apps. Are you asking me which ones? Well, for example the ones you can find below.
DiskDigger (Android)

If you are interested in recovering deleted files after formatting your Android smartphone, you can use the DiskDigger app. It allows you to recover all kinds of files removed from the terminal's internal memory (as well as SD cards inserted in it) in a very easy way. It is available in two variants: a free one, which only allows you to recover images in JPG and PNG format; and a paid one (costs 3.37 euros), which also supports all other types of files. Note that, to work, it needs root.
To download the application to your device, go to the Play Store section and tap the Install button or the price button (depending on the version of DiskDrigger you have chosen to download) and the Accept button. After installation, launch the app and tap the Grant button that appears in the middle of the screen, to grant DiskDigger root permissions. Then select the partition to analyze, indicate the types of files to search and press the OK button to start the analysis procedure.
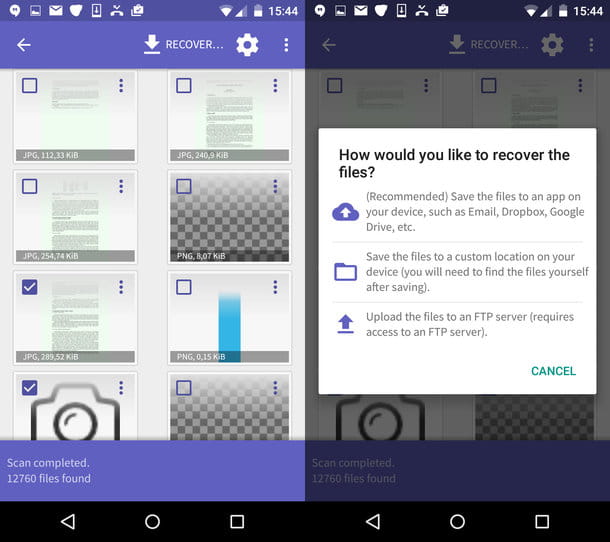
Once the scan is complete, the files found by the app can be recovered by selecting the relevant thumbnails and tap on the Recover button, located at the top left. Next, you can decide whether to save the data to a cloud storage service or send it to you via email, whether to save it to a folder on your device or to an FTP server.
EaseUS MobiSaver Free (Windows/macOS)

If you own an iPhone and you are interested in trying to recover data that was present on the device before recovery, you can rely on EaseUS MobiSaver Free - it is a free software with which you can recover files that have been removed from the "melafon" in a fairly simple way. It works both on Windows and MacOS, it requires iTunes (for more information, you can refer to my tutorial on how to download iTunes) and it is also available in a paid version (it costs 79.24 euros) thanks to which you can get around some limitations of the basic version, such as the maximum number of contacts you can recover.
To download it on a Windows PC, go to its official website, press the Free Download button in the middle and the Download button on the next page. When the download is complete, open the obtained .exe file and, in the window that appears on your desktop, click on the Yes button. Then click on the OK and Next buttons, select I accept the terms of the license agreement and click the Next button twice in a row. Then remove the checkmark for the installation of any additional software, click the Next button again and, to finish, click the Install and Finish buttons.
If you are using macOS, go to this other web page and click the Free Download button on the left. When the download is complete, open the resulting .dmg package and drag the EaseUS MobiSaver Free icon into the Applications folder of macOS, then right-click on it and select Open twice to circumvent Apple's restrictions on applications from non-certified developers (this is only required the first time you start up).
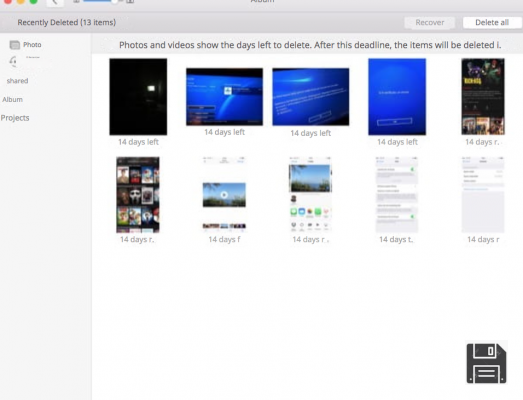
Now connect your iPhone to your computer using the cable attached to the sales package of the device and press the Scan button. Once the scan is complete, select the Show only deleted items item at the top. Then place a checkmark next to the thumbnails (or names) of the items you want to recover, click the Recover button at the bottom and select the folder to save it to. If you feel you need to, you can also filter the files you find by category using the filters on the left sidebar.


