Did you accidentally delete some files you were keeping on an SD card and don't know how to recover them? Don't beat yourself up, it can happen to everyone to make a mistake. Also, the last word hasn't been said yet. With a bit of luck you might still be able to recover your data, or at least some of it.
Yes, that's right! You read right! Using some free software like the ones I'm about to tell you about, you may be able to recover deleted files from SD card even if the situation now seems desperate. You just have to hope that the SD card sectors on which the data was stored have not already been occupied by new files (in that case, I'm sorry but there's not much to do).
I can't promise you that you'll find all your data or that you'll be able to recover it 100% - it all depends on the status of your SD card and how you've managed the data on it - but trying doesn't hurt, so don't waste any more time and find out which programs you can rely on right now. I'm keeping my fingers crossed that it all works out for you. The best of luck!
Disk Drill (Windows/macOS)
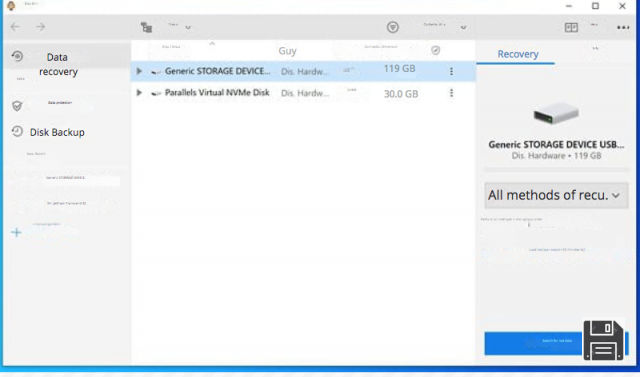
Disk Drill is one of the best software designed to recover deleted data. It supports not only SD and microSD, but also USB sticks, hard drives, SSD and other storage drives. Moreover, it is compatible with both Windows and MacOS and has a fully translated interface.
It allows you to recover photos, videos, documents, compressed archives and many other types of files, also offering the possibility to preview them before export. Additionally, it supports unformatted and RAW file systems and Recovery Vault feature, which allows the program to store the metadata of deleted files and thus displays their real name (instead of incomprehensible strings) during recovery, thus speeding up the search for the right files to restore.
You can download and use Disk Drill for free to recover up to 500MB of data (which is equivalent to hundreds of photos, for example). The license for the full version of the software is priced from about 100 euros and can be used on 3 workstations, regardless of the operating system used.
That said, to download Disk Drill for Windows on your PC, connect to the official website of the program and click on the Free Download button. Then open the obtained .exe file and, in the window that opens, click first on the Instal button and then on Yes. When the automatic setup is complete, click the Close button to close the window.

Now, to recover deleted data from your SD/microSD card (or any other drive), start Disk Drill and click the Yes button first, then Accept and Continue (to accept the terms of use of the software) and finally Continue. Choose, then, whether to activate the Recovery Vault function by moving the Enable Data Protection tab to ON and whether to share anonymous info with CleverFiles (via the appropriate box) and click on the Start button, to access the main screen of the application.
Now, click on the icon of the SD/microSD or any other drive from which you want to recover files and click on the Search lost data button located at the bottom right (if you want, you can choose the data recovery method to use via the right menu). Once the scan results appear (which you can pause, using the scan button at the top), click on the type of file you want to recover between Images, Videos, Audio, Documents and Archives, so that you can see the detailed list of files to recover.

Now, search for files to restore, check the boxes and press the Restore button at the bottom to start exporting them to a folder of your choice. To view the previews of the files to be recovered, click on the eye icon that appears next to their names when you hover over them with the mouse cursor.
If you wish, you can also filter the search results by clicking on the Filter button (top) and using the options that appear on the right: you can filter the results according to the minimum file size, the date of deletion and choose whether to show the hidden system files. On the left, instead, you can choose the category of files to be displayed among Images, Videos, Audio, Documents, Archives, etc..

If you use a Mac, you can download the Basic version of Disk Drill from the program's official website and install the application on your computer by simply opening the obtained .dmg file and dragging the Disk Drill icon into your MacOS Applications folder.

Once that's done, start the software, click the Start button, type your Mac administration password and press Enter. Then you need to press the Open Security preferences button, click the lock icon in the lower left corner of the System Preferences window that appeared on the screen in the meantime, type the Mac administration password again, enter it and click the Allow button in the lower right corner.
After that, move to the Privacy tab, select Full Disk Access from the left menu and tick the Disk Drill.app and BackService.app boxes, to allow Disk Drill to access the disk. If you are asked to exit the application, accept.

Now, restart Disk Drill, choose whether to continue using Disk Drill Basic (which allows you to view the files you want to recover but not export them) or switch to the Pro version of the application (the full version) and click the Recover button for the drive from which you want to recover the files.
When the scan is complete, tick the boxes for the files you are interested in (you can see previews of them by clicking on the eye icon that appears when you hover the mouse next to their names) and click the Retrieve button, in the upper right corner, to export them to a folder of your choice.

If you want, you can also filter the search results using the drop-down menu at the top and choose whether you only want to view Images, Videos, Audio, Documents, Archives or other files. Simple, right?
PhotoRec and TestDisk (Windows/macOS/Linux)
Among the best software to recover deleted files from SD are PhotoRec and TestDisk, two free and open source programs that come in pairs.
PhotoRec is specifically designed to recover deleted data. It works with various devices: memory cards, USB sticks, external drives etc. and is extremely easy to use. TestDisk on the other hand is designed for recovery of lost partitions and recovery of damaged disks, it can also be used for data recovery from SD but let's say it is not its main occupation. It only works as a command line, so it requires a bit more effort to be used.
Both software are multi-platform, they work on Windows, MacOS and Linux, but you have to take into account some differences between the various operating systems. PhotoRec, for example, comes complete with graphical interface on Windows only, on macOS it works as command line only. TestDisk, on the other hand, works as a command line on all platforms.
Having clarified this aspect too, I would say to go straight to the action and see in detail how the two programs work. If you have a Windows PC, I suggest you try PhotoRec first, which is easier to use. If PhotoRec fails in its mission, try TestDisk, it may have some great surprises in store for you.
PhotoRec

To download PhotoRec (and TestDisk) to your PC, go to its official website and click the Windows item below TestDisk & PhotoRec 7.0. When the download is complete, open the zip archive you just downloaded from the Internet, extract the content into a folder of your choice and launch the qphotorec_win.exe executable.
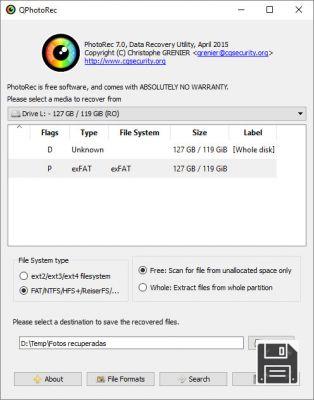
In the window that opens, use the PhotoRec drop-down menu to select the SD card drive from which you want to recover files (if your computer does not have an SD card reader you can use a USB adapter) and select the primary partition of the device (it should be the one named FAT32, FAT16 or exFAT).
Now, put the check mark next to FAT/NTFS/HFS+/ReiferFS and Free, click the File formats button and choose the file formats that PhotoRec should try to recover. You can choose between video (mov/mp4/3gp/3g2/jp2),**** JPG and PNG format photos, compressed archive documents and much more. To reset the preset file selection in the program, click the Reset button.
When the operation is complete, click the OK button, choose the folder where you want to save all the files that PhotoRec can recover by pressing the Browse button and click the Search button, to start data recovery. At the end of the procedure, you will find all the data recovered from PhotoRec in the folder you selected earlier.
TestDisk

Now let's move on to TestDisk, which as mentioned above only works as a command line. To download the program on your PC (together with PhotoRec), please go to its official website and click on the Windows link or the Mac OS X Intel link (depending on the operating system you use).
When the download is complete, open the archive containing the software (e.g. testdisk-7.0-WIP.win.zip on Windows and testdisk-7.0-WIP.mac_intel.tar.bz2 on Mac) and extract the contents to any folder. Then insert the SD memory card from which you want to retrieve the files into your computer's reader (you can use a MicroSD-SD adapter in the case of smaller cards) and start the program testdisk_win.exe (testdisk on OS X). Click Yes and a Command Prompt window will open (or Terminal if you are using a Mac).
Now, to start retrieving your data, press the Enter key on your PC keyboard and select the drive for your computer's memory card reader (e.g. Multiple Card Reader) - just use the arrow keys and press Enter.
Next, select Intel, go to Advanced and press Enter, to select the SD partition from which to recover data (there is usually only one).
At this point you should be faced with a list containing the names of the files deleted from the memory card, highlighted in red. Select one of the documents to be recovered and press the C key on your computer keyboard to copy it to a folder of your choice (press C, to save it to the TestDisk root directory on Windows and to the /Users/Tenone/ on Mac folder). Repeat the operation with all the files to recover and you are done.
EaseUS Data Recovery Wizard (Windows/macOS)

EaseUS Data Recovery Wizard is one of the best software for recovering deleted files not only from SD but also from hard drives, SSDs, USB flash drives, cameras, mobile devices and other storage drives. It is extremely intuitive, supports any type of files (images, videos, documents, compressed archives etc.) and can be used in the most diverse scenarios.
The solution offered by EaseUS allows you to recover files from formatted or damaged drives, data recovery after emptying the Recycle Bin, after deleting a partition, recovery from system crash, recovery after malware attack, RAW partition recovery and more, all in just three easy steps: boot, analysis and recovery.
EaseUS Data Recovery Wizard is compatible with both Windows and MacOS and is available in various versions: the basic version, free, which allows you to recover up to 500MB of data (2GB, if you share the program online) and the paid version, without limitations on recoverable files, with prices starting from 66.69 euros.
That said, to download EaseUS Data Recovery Wizard Professional for Windows, connect to the official website of the program and click on the Free trial button: by doing so, you will get the full version of the software to activate with the purchase of a license (without registration you will only see the files to recover, you will not be able to save them). To download, instead, EaseUS Data Recovery Wizard Free and have the possibility to recover up to 2GB of data at no cost, connect to this page of the EaseUS website and click on the Download Free button.
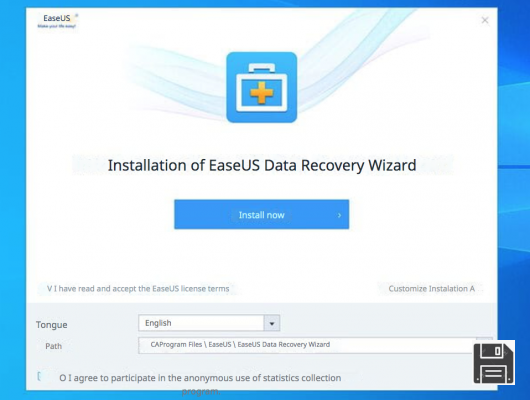
When the download is complete, regardless of which version of EaseUS Data Recovery Wizard you have downloaded, open the obtained .exe file and click the Yes button in the window that opens. Make sure, then, that the EaseUS license conditions box (bottom left) is checked and click on the Install now button, in order to start downloading all the components necessary for the operation of EaseUS Data Recovery Wizard and their subsequent installation on your computer. If you do not want to send anonymous statistics regarding the use of the software, click on the Customize installation item (bottom right) and uncheck the appropriate box. To finish, click the Start Now button to close the window and start the EaseUS Data Recovery Wizard.
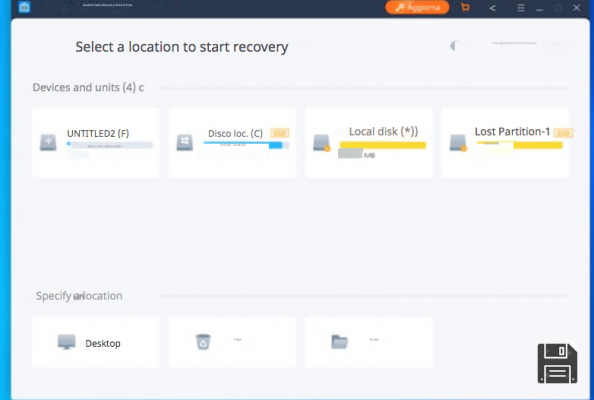
Now you can take action. Select the SD icon from the home screen of the EaseUS Data Recovery Wizard and click on the Scan button at the bottom right to start scanning the drive.

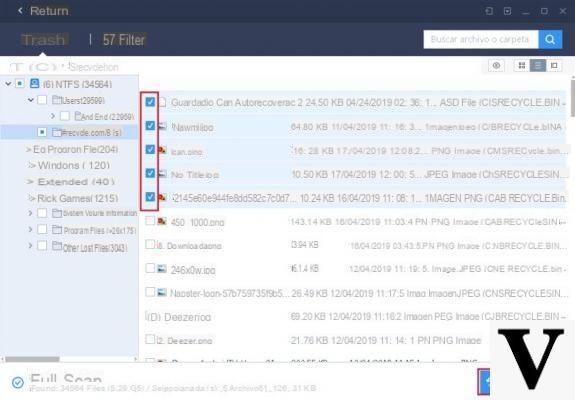
When you see the files you are interested in, select them (by ticking the relevant boxes) and click the Recover button, at the bottom right, to indicate the folder to export them to and start the recovery process.
If you want, you can select the various folders that appear in the left sidebar or the Filter item, at the top, to filter the search results according to the types of files you are interested in (e.g. JPEG or PDF).
If you use a Mac, you can download the EaseUS Data Recovery Wizard using the links I provided earlier and clicking on the Mac version of the software. To install the program, instead, open the obtained .dmg package and drag the EaseUS Data Recovery Wizard icon into the Applications folder of your computer. Easy, right?
Recover (Windows)

Now I want to tell you about Recuva, a great free application for Windows made by CCleaner developers themselves (very popular disk cleaning and Microsoft operating system optimization software) that allows you to recover deleted files from SD, hard drives and other drives in a very intuitive way. To try it right away, log in to its website and click on CCleaner.com.
When the download is complete, open the software installation package (rcsetupxx.exe), select English from the language selection menu (top right) and click on Install first and then on Run Recuva, to complete the installation process and start Recuva.
Now you just need to start Recuva, click the Next button and select the type of file you want to restore: Images, Music, Documents, Videos, Compressed archives, Email or All files. Then put a check mark next to the entry on the media card or iPod and start scanning the memory card by clicking Next and then Start.
When you are done, place a check mark next to the names of the files you want to recover (those with green traffic light are 100% recoverable, those with yellow traffic light might be corrupted while those with red traffic light are unrecoverable) and press the Recover button. Finally, select the folder where you want to export the data and give OK to start the actual recovery of the selected files.
You can also take advantage of the in-depth scan feature, to attempt recovery of data that is not found in the standard scan, just tick the appropriate option before starting the drive check (on the last screen of the wizard).
DiskDigger (Android)

Do you have an Android smartphone or tablet with microSD support? In this case you can try to recover deleted data from memory card using DiskDigger.
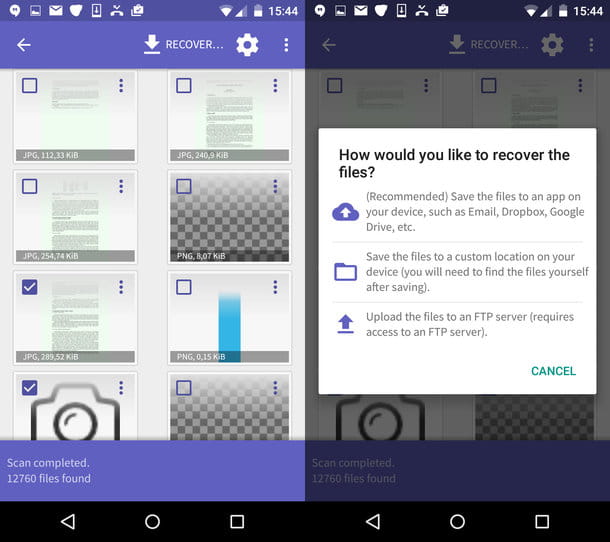
DiskDigger is a very easy to use application that allows you to recover deleted files from microSD or internal memory of your device without using your PC. It comes in two versions: a free version that allows you to recover only photos in JPG/PNG format and a paid version that allows you to recover videos, PDF, compressed archives, applications and other file types. To find out how it works read my tutorial on how to recover deleted files from Android.


