What is the green screen

Il green screen (green screen), also called chroma key (color key inlay) is a technique used to replace the background in a video. It is a green cloth that acts as a background while turning and which then allows it to be easily replaced with the desired background, thanks to the use of the appropriate function of the video or photo editing programs.
You may have also seen the blue screen, which has been replaced by the green one because it is better for digital equipment. The concept on which the green screen technique is based is the replacement of the background which, being of a uniform color, makes the subject of the video easily separable from the background itself. This subsequent operation is done during the assembly phase, with special programs.
On the market there are many types of green screens: some very simple, which cost even less than 20 euros, and others more professional, perhaps equipped with a frame and anti-crease system, which can even exceed 100 euros in cost. Then there are complete kits with lights, green screen and support, which I highly recommend you to consider if you are a beginner: having the right support is very important, because the green screen will be positioned better and if well lit it will make the operation. replacement of the background much easier and free of imperfections.
Below, you will find some green screens and kits that I recommend you consider. Below, we will then see how to exploit them from computers, smartphones and tablets.
See offer on Amazon See offer on AmazonHow the green screen works
The first step you need to take is to shoot your video with the background green screen by following some technical precautions, such as those listed below. Next, I'll show you how to use the green screen in the main video editing programs for PC, smartphone and tablet, in order to customize the background.
Preliminary information

The first operation to be performed, as already mentioned, is to set up the set to shoot the video with the green screen. To ensure that the editing operation proceeds smoothly, you need to have some small but fundamental precautions.
First, the green screen has to be tightly stretched, with no ripples or shadows and it must cover the whole frame well. It is therefore advisable to purchase the green screen with a structure that supports it. It is also essential that thelighting is very good, diffused and does not create shadows on the green screen, which would complicate the subsequent editing work.
Then it is necessary avoid wearing colors similar to the green of the green screen, unless you want to voluntarily be part of the background and "disappear" into it. Once the video is shot, you can move on to the editing operation, replacing the green screen background with the background you like best. Now let's see in detail the programs to use. For further information, you can search on Google for specific guides on the positioning of the lights.
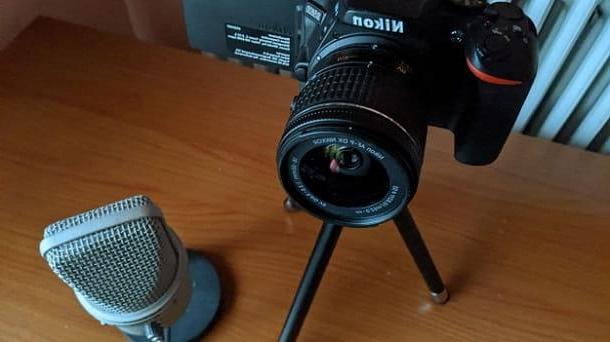
Almost needless to say that the shots must be done with good quality equipment: I recommend a good video camera or a good DSLR; if you really want, however, you can also turn to a camera phone, that is a smartphone with a good photographic sector: you will find many tips for purchasing these devices in the guides that I have just linked to you. Having said that, let's move on to processing the videos in the various editing software.
How to use the green screen with Adobe Premiere Pro

One of the most used video editing programs, even in the green screen field, is certainly Adobe Premiere Pro. The version for both Windows and macOS is available and can be downloaded from its official website. The free trial is for 7 days, then you move on to purchase the full version of the software with different monthly or annual billing plans. To download the program, registration to the Adobe Creative Cloud service is required, starting from 24,39 euros / month. To find out how to download and install Adobe Premiere Pro, if you need it, I suggest you take a look at this guide on how to edit a video in which I illustrate the software installation procedure in detail.
To use the green screen effect with Adobe Premiere Pro, first open the program and, from the home screen, click on the item New project. In the window that opens, enter the title of your project and confirm by clicking on the button OK. Alternatively, click on the menu Fillet in the top bar, then select New e Project. Then enter the title you have chosen for the project and confirm with the key OK.
Now you have to import the video shot with the green screen into the program. Then click on the menu Fillet e scegli l'opzione Import from the latter. From the window that opens, select the video with the green screen to use and click on the button Import. Once you have imported the video shot with the green screen, drag it into the window Timeline, down.
To replace the green background, you need to open the effect present in the program. To do this, you need to select the item Effects among the options above. A window will open with the effects to choose from and you will need to select Video effectsby clicking on the arrow. Once this is done, click on the item Types of transparency and then on that Incredibly . Before proceeding, make sure you have selected the video in the timeline by clicking on it.
Now you have to select the color to replace: to do this, you have to click in the panel Effects control, at the height of the option Key color on the instrument dropper. With this tool you can pick the color you need directly from the video image.
Now that you have clicked on the green background with the eyedropper, the next step is to import the background to be replaced into the program. To do this, click on the menu Fillet in the top bar and select the option Import. At this point, select the video you have decided to put as a background and drag it into the window Timeline. Its location is under the main video.
The background replacement operation is complete. Now you just have to save the final result. Then select the item Fillet (top left) and click on the items Export e Multimedia files, to choose the export format, and finally click on Export. This way your project will be saved and ready to be used wherever you want.
How to use the green screen with Sony VEGAS Pro

Sony VEGAS Pro is another very popular commercial video editor, available only for Windows. To use Sony VEGAS Pro, you need to download it from its official website: to do so, choose the free trial option, Free trial, lasting 30 days, at the end of which you can switch to the purchase of the full version, at the price of 399 euros. To learn more about the procedure required to download and install Sony VEGAS Pro, I suggest you read this tutorial of mine.
To use the green screen with Sony VEGAS Pro (the version of the program used is indifferent), the first operation to be performed is to start the program. Once this is done you can add the video shot with the green screen. To do this, just click on the menu Fillet, in the bar at the top, then select the items Import e Media and select the video shot with the green background, to open it.
Once the video is open, drag it to the timeline placed at the bottom. At this point, you need to select the green screen effect it is in Tools, in the top menu bar. Then select the items Video e Media FX, to access the menu with all effects. Among the effects that the program makes available, choose VEGAS chroma keyer (or Sony chioma Keyer). In the window that opens, then click on colore and then on the instrument dropper, selecting the green background color with the latter.
Now that you've selected the green background, all you have to do is import the video to replace and put it in its place. To do this, just click on the menu Filletat the top and select items Import e Media. At this point, select the file with the background and open it in the program. Once that is done, drag this video to the timeline, under the video already present.
The editing is complete and you just have to save the edited video: to do this, click on the menu Fillet (above) and choose the option Render as from the latter. Select, therefore, the format you prefer for saving, click on the button yield and your work will be done.
How to use the green screen with iMovie

iMovie is a free program present “standard” on all Macs. To open it, simply select its icon in the Launchpad (the rocket present on the Dock bar) or in Finder, going to the folder Applications. In case the software is not present on your Mac, you can download it at no cost through the appropriate section of the Mac App Store.
That said, let's take action. Once iMovie is open, click on the button Create new e seleziona l'opzione Footage between the two available choices. Now you have to select and upload the two videos you need, namely the one shot with the green screen as background and the one that will constitute the actual background. To do this, click on the menu Fillet that you find in the bar at the top and select the item Import media files present in the latter.
Then choose the video files and click on the option Import selected files. Then drag in timeline both the background file and the file shot with the green screen, putting the background movie at the bottom. It is important to respect the order of the files because the available options change depending on the position in the timeline.
Now you have to apply the green screen effect: to do this, select the video with the green background and, in the movie box located at the top right, click on the icon Video overlay settings. From the options you now see in the drop-down menu, select green / blue screen.
Well: now the montage is complete and the green background is replaced with the one you have chosen.
As a last step, you just have to save your work by clicking on the menu Filletat the top by selecting the item Share from the latter and choosing the option you prefer from those available. If you want to learn more about how iMovie works, read this guide of mine.
How to use the green screen with Photoshop

As mentioned, the green screen can also be used in the photographic field, therefore with photo editing software, such as the very famous Photoshop. The program is available for both Windows and macOS and can be downloaded from its official website. It is available in a 7-day free trial version, at the end of which it is possible to switch to the paid plan, through the subscription to the Adobe Creative Cloud service (24,39 euros / month). To learn more about the Photoshop download and installation procedure, I suggest you read this tutorial of mine.
To replace the background of a photo taken with the green screen in Photoshop, you must first open the photo you took using the green background: to do this, click on the menu Fillet, in the top bar, select the option apri from the latter and choose the image to work on from your computer.
Now add a new level by clicking on the menu Subscription in the top bar and choosing the option New background layer from the latter. Now you have to select the green background, in order to remove it and replace it. Photoshop has many selection tools, but the green screen lends itself very well to selection by color range: to activate it, click on the menu Selection in the top bar, choose the item Color range and, with the tool dropper, click on the green screen. You can change the tolerance of the selection with the slider.
At this point, click the confirm button, OK, and you will see the selection on the photo. With the key Del / Backspace on the keyboard, delete the selection and the background will become transparent. To deactivate the selection, however, click on the item Selection in the top bar and choose the option Uncheck give the menu check if you press.
Now you can add a background color to the photo by creating a new layer from the menu Subscription (above), choosing the option New level and confirming, using the button OK. The new layer is placed below the layer with the subject cut out. Next, with the tool Bucket (available in the left bar), choose a fill colorby clicking on the color icon and then on the background. Check that you are positioned on the new layer and not on the image layer, using the layers panel located at the bottom right, otherwise the effect of the fill will not be full.
Alternatively, you can put another photo as a background. To do this, open the chosen photo (by clicking on the menu Filletby selecting the command apri and double clicking on the image to open). A new panel with the photo will appear. Now, holding down the left mouse button, drag it from the right layer window onto the cropped photo panel.
Finally, adjust the size, using the combination Ctrl + T / cmd + t and the points to transform the image that appear on the screen, and save the final result by clicking on the menu Fillet and selecting the option Save with name from the latter. To learn more about how Photoshop works, I leave you to this guide of mine.
App to use the green screen
If you are wondering if it is possible use the green screen with apps for smartphones and tablets, you must know that the answer is yes: there are some applications that allow you to recognize and cut the green screen to replace it with another background. Here are some of them.
PowerDirector (Android / iOS)

The app PowerDirector available for both Android and iOS / iPadOS, it allows you to create a montage between photos or videos made with a green screen and background of your choice. Its basic version is free, however it watermarks the generated videos. To remove the watermark and unlock extra features, you need to make in-app purchases (about 5,50 euros for the monthly subscription, at the time of writing).
Once the application is downloaded, tap on the item New project and, after choosing the format of the movie you want to create, open the file you want to be mounted as a background. By tapping on the image and then on the sign +, the file will be added to the timeline.
Now that you have selected the background to replace, all you have to do is add the video you made with the green screen. To do so, tap on the symbol Overlap, in the menu on the left, and select the video or photo that interests you. This command allows you to open the file above the background.
Now enlarge the overlay image and, again from the menu on the left, select the option Modification (the one with the pencil symbol); then, from the window that opens, select the item Chroma key. With the Dropper, then select from the image the color of the background that you want to be replaced (in this case, the green of the green screen) and adjusts i cursors, to be as precise as possible. Finally, close the window and the assembly is done.
To save the project and export it, tap on the appropriate icon located at the top right, select the item Produce video and choose the output option. Easy, right?
Kinemaster (Android / iOS)

Kinemaster is another great video editor available for both Android and iOS / iPadOS devices. Its basic version is free, however it imprints watermarks on the videos produced, which can be removed through in-app purchases (from 2 to 6 euros), which also allow you to unlock various effects and extra functions.
Once the app has been downloaded and started, tap on the image in the larger sticker to start creating a New project. Then select the video format you wish to achieve.
Then, load the file you have chosen as the background and which will then replace the green of the green screen: tap on Gallery in the disc-shaped menu on the right side of the smartphone screen. You can choose both a photo and a video among those present in your device. The file will be automatically loaded into the timeline.
Now, to add the second video, tap on the item Subscription in the disc-shaped menu on the right and select the option Gallery. Here too you can add a photo or a video, the important thing is that it was done with the green screen.
Now the two images are superimposed and you can adjust their size. On the right side of the screen, the menu with the various editing options will automatically open. If you accidentally notice that you have closed it, just tap on the video with the green screen on the timeline and all the options will reappear. To merge the two images, then tap on the item Chromatic key and rule i cursors present, to enhance the effect.
Once the changes have been confirmed, all that remains is to save the montage by tapping on the appropriate one up arrow icon (located at the top right and then on Export. The app will present you with paid options for removing the watermark and adding premium features. If you want to continue with the free app, tap the button Salta. You will find the final file saved in the Gallery of the smartphone.
Other apps to use the green screen
If you want to try too other apps for use with the green screen, I propose you some that I sincerely hope can be for you.

- Chromavid (Android / iOS / iPadOS) - this app works slightly differently from what we have seen so far. In fact, it combines the chosen background with a video or a photo that can be done directly inside it. This means you can be in front of your green screen, open the app and try out different backgrounds before merging and saving. It's basic free, but features a paid premium option that removes the watermark and gives you access to extra wallpapers and features.
- Green Screen Live Video Recording (Android / iOS / iPadOS) - allows you to replace the background of a video or photo with one of the available backgrounds or a personal background loaded in the smartphone. Also this app allows you to see the result of the editing already in the recording phase. It presents a paid version that in addition to giving access to extra content, removes the watermark otherwise present in the final save.
- Veescope live (iOS) - is an app that allows you to create photos or videos with the green screen technique to replace the background. You can use the wallpapers proposed by the app or upload your own wallpapers present in the smartphone. The free version imprints a watermark on the videos: to delete it, you have to switch to the paid version.


