Preliminary information
If you are reading this guide in anticipation of purchasing a new video card, you must first know the features of the motherboard and power pack your computer is equipped with, so you can choose a component that is compatible with the first and that is able to be adequately powered by the second (which, if necessary, you can still change).
To get valuable information on the motherboard in your possession, I recommend that you rely on the software Speccy, which can be downloaded for free Windows. So, after opening the home page of the program, click on the link FileHippo.com, then on the button Download Latest Version and on the voice No, thanks, continue to download Speccy, in order to start downloading the program to the disc.
Once you have the installation file (spsetupXXX.exe), start it, click on the button Yes and configure the setup program to complete a "clean" installation of Speccy, without additional programs: to do so, put the check mark next to the item No thanks, I don't need CCleaner and start the actual setup by clicking on the button install.
At the end of the installation process, press the button Run Speccy, to start the program: from the new screen opened, go to the section Motherboard and write down the make and model of the motherboard in use on your PC. Once you have this information, do a short Google search to check the type of slot that can be used for mounting a new video card: PCIe/PCI-Express 8x or 16x or, for older computers, PCI or AGP.

If your computer already has a dedicated video card and you are considering replacing it, go to the card Graphics by Speccy and take a look at the wording Bus Information to retrieve the type of slot your video card is currently connected to.
Clearly, when purchasing, you will have to consider only video cards with compatibility with the slot your motherboard is equipped with, in order to avoid buying an unusable device.
As for the "energy" aspect, as mentioned above, you need to make sure you have a quite powerful power supply to be able to provide the adequate energy supply to the video card you are about to mount. To verify it, turn off the computer, remove the socket, wait a few minutes for the internal temperature to drop sufficiently, then remove the side panel of the case opposite to the one on which the motherboard is installed (usually located to the right of the case, if you look at it from the front) and locate the area dedicated to the power supply.
It is generally located in the lower left or upper right, depending on the model of the case on which it is installed. Looking closely at the power supply, you should see a label indicating the maximum power it is capable of supplying to the computer components, expressed in Watt. Generally, for the purposes of this guide (and possibly to be able to deal with future hardware upgrades), the power that can be supplied by the power supply should be at least 600 W.
If the unit in your possession is not powerful enough and should arise the need to buy a new one, you can take a look at my guide dedicated to the choice of PC power supplies, in which I have provided you with useful tips for the purchase of a new device of this type.
Once you have carried out all the necessary checks, you can finally proceed with the purchase of the video card that best suits your needs: personally, I recommend that you orient yourself towards models produced quite recently, especially if your goal is to be able to play with the computer or to employ programs that require complex calculations for graphic processing.
In any case, when choosing, remember to keep in mind a series of fundamental parameters: the compatibility with video slots your motherboard is equipped with; there processing power overall and the number of active graphics processors; The amount of video RAM; the physical dimensions of the card and, finally, the presence or absence of independent cooling.
If it is your intention to deepen this discourse, my guide dedicated to buying a new video card may be useful, in which I have analyzed the issue of the smallest details, providing you with a series of prudent choices based on your needs and the performance you intend. obtain.
How to mount a video card on a PC

Once you have the component that best suits your needs, it is time to take action and install it on your computer: it is therefore time to understand how to mount a video card on the PC.
First of all, I feel it is my duty to make you some recommendations: before anything else, make sure you choose a stable and sufficiently large work surface, to be able to rest the case in a horizontal position, thus limiting the possibility of accidental falls or accidents of various kinds to a minimum.
Plus, be sure to take action no current and to have turned off and unplugged the computer from electricity at least 15 minutes before starting to operate, so as to allow the internal environment to cool down properly and reach an easy temperature.
Finally, in order to avoid any residual current discharges and preserve the integrity of the metal materials of the components involved, be sure to act equipped with gloves of latex, nitrile or other material: in this case, they act both as an insulator and as a protection, both for your hands and for the motherboard and video card.
If you don't feel safe enough, at least for the first few times, don't be afraid a let you assist by a friend with specific skills on the subject, or by an expert technician: an assembly error could compromise the correct functioning of both the video card and the entire motherboard.
Having made the necessary clarifications mentioned above, the time has come to concretely get to work: after turning off the computer, disconnecting the power supply and waiting for it to cool down, disconnect all cables from the case (including that of the monitor connected to the old video card) and place the latter on the work surfacein horizontal position, facing down the side where the motherboard is installed (usually the left side, if you look at the case from the front).
Once this is done, proceed to remove the opposite side panel (the right one), so as to have full vision and complete access to all the internal components of the computer, then unhook the auxiliary power cable of the video card (connected to the visible side of the same) and, using a small screwdriver, suite la vite which secures the video card to the case: usually, it is located behind the metal part that shows the video outputs.
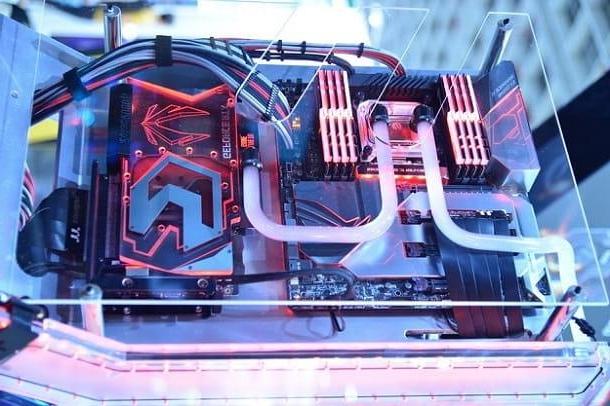
Once the locking screw is removed, proceed to remove the video cardgently lifting it up until it completely loses contact with the PCI-Express slot. If you have a PC with a liquid cooling system and the video card is connected to the central cooling unit, remember to disconnect it by removing the two "tubes" attached to the top of the video card.
After this step too, you can proceed with the installation of the new motherboard: it eliminates all types of labels, films or other protective component placed on the fans, connectors and ports of the new video card, then place it carefully inside the case until it fits into the connector PCI-Express. At this stage, keep in mind that the fans, if any, must be oriented towards the bottom of the houses.
If the computer in your possession has a complete liquid cooling system, remember to connect the central cooling unit to the appropriate slots located, generally, in the upper part of the video card, if prepared.
Now, you just have to screw the fixing screw dedicated to the metal mask again and reconnect the auxiliary power cable to the appropriate housing, located on the visible part of the new video card. Some powerful units of this type need no less than two auxiliary connectors: take a look at the video card user manual to find out if, indeed, this is the case for you.

The game is done! Once the installation of the new video unit is finished, you just have to close the case, screwing the side panel, reconnect the cables removed previously and turn on the computer. The first boot may take longer than expected, as the operating system will recognize the newly installed video card as a new device.
If the computer fails to start, showing you a black screen and emitting a series of seemingly meaningless sound alerts, turn it off, disconnect it from the power supply and, after waiting 15 minutes, open it following the same steps seen above and make sure that the card video is properly inserted in the PCI-Express slot; also check that the auxiliary power cable is properly installed.
Once logged into the operating system, you can remove the old video card driver and install thelast available for the one just installed: I showed you how to do it in my tutorial on how to update the video card driver.
Note: if you have installed the new video card in addition to the one already integrated on the motherboard, you can choose to use one instead of the other by adjusting the operating system settings, or on the management panels supplied with the GPU drivers. For more information, I invite you to consult the appropriate section of my guide on how to change the video card.
How to mount a video card on a notebook

If you are thinking of mount a video card on a notebook… I tell you right away that things are a lot more complex. The video cards of laptops, even the discrete ones (ie added to the module integrated in the CPU), are soldered to the surface of the motherboard, therefore they cannot be easily removed or replaced.
Some notebooks, however, have external slots for installing dedicated video cards: to date, however, coming across such a device is quite rare.
Therefore, since the video cards of notebooks are not removable, you will have to carry out the eventual update using a very different solution than the one seen previously, which involves the purchase of a cases for external video cards.
These "casings", equipped with PCI-Express slots prepared for connection to classic video cards, are compatible with all notebooks equipped with Thunderbolt 3. Such doors appear quite similar to doors USB 3.1 C and are identified by the symbol of a lightning.
Vedi offers your AmazonBefore continuing, however, I have to make you aware of a very important detail: many external video units they work, giving appreciable results, only with certain software and games, with which they are officially compatible. Please take this information into account when purchasing.
Furthermore, in order to implement such a solution, you will need a second monitor to be connected to the external video card, since the latter is not able to direct the signal received by the processor to the screen integrated in the laptop.
If your notebook is equipped with a Thunderbolt 3 port and you have already got everything you need, you can easily install the new video card: insert the new video card inside the case and connect it to the slot PCI-Express located inside, therefore, connects the notebook to the external case using a Thunderbolt 3 cable da 40 Gbps. If it is not included in the sales package of the adapter, you can easily get it online.
Once the link is finalized, proceed to install the drivers supplied with the case, and when you're done, connect an external monitor to it using the port that works best for you (HDMI, DisplayPort, etc.).
Once this is done, turn on the monitor and start the game or program of your interest directly from the notebook: it will use the laptop's CPU, RAM, hard disk and motherboard for data exchange and processing, while for video calculations will use the card inserted in the case.
How to mount a video card


