Considerations to make before starting
Before proceeding to use specific software for recovering files that have been deleted from Mac, it is always recommended to perform a few simple routine steps to make sure the problem can be solved without the help of third parties.
In fact, very often, when you do data is deleted these are simply moved to the Recycle Bin, are not permanently erased from the hard disk.
In other words, such files are hosted in a dedicated folder where they are kept for a predefined period of 30 days. Within this time frame, all the finished data in the holding file can be easily and quickly recovered.
In addition to this consideration, before installing new programs on your pc you should also:
- Try to recover the data through the pre-set applications on the device
- Reduce disk usage on which you intend to recover the files, to prevent the free space from being occupied by other data
- Install new software on a dedicated disk
How to recover deleted files from Mac without the help of programs
Accidental loss of data from your PC is one of the most annoying unexpected events to face when you are working. By now, computers have become veritable safes that hold the most varied of information, and when we lose control of the system all our computer knowledge is put to the test.
Are available numerous software enabled to recover deleted data on Mac, some can be downloaded for free, while others are paid services.
Before relying on such programs, however, let's try to see how this is possible restore lost files using iOS operating systems internal settings.
Recover deleted files from Mac via iCloud
If you are using iCloud as the default storage location on your Mac, then there is a good chance that you can restore deleted files. As always, you have to act quickly to be able to save all deleted data. In this specific case, iCloud keeps unwanted files in its online memory for 30 days before getting rid of it permanently.
In order to recover data from iCloud deleted on Mac you need to:
- Open iCloud.com and enter your Apple credentials
- Proceed with “Settings” > “Advanced” > “Restore Files”
- Select all the files you want to restore
- click on “Restore Files”
Restore a previous version of a document on Mac
It can happen to anyone who wants to change their mind while editing an important document. Maybe after hours of making it better we realize we prefer the original version. Don't worry, all newer MacOS models have a integrated system that allows the recovery of previous versions of a file or document.
This operation, called versioning, is made possible thanks to a saving of information that takes place in the background every five minutes. For recall a document to its original state you just need:
- Going up "File"
- Scegliere “Reset to”
- Select the item "Last Saved" or "Browse all versions"
- Once you see the version of the document you are interested in, click "Reset"
Recover files that have been deleted from the recycle bin
When you want to do some cleaning on your Mac, the files we decide to delete are not automatically deleted, but they are simply moved to the computer's Recycle Bin. If we have not taken steps to empty it, all the data contained in it can be restored quickly and easily.
In fact, the operation to be carried out to recover files from the Recycle Bin is simple, just follow these few steps:
- To open "Trash can"
- Right click on the file we want to recover
- Click on the entry "Back" or "Reset", depending on the version of Mac you have.
Time Machine: how to backup and restore data
Thanks to Time Machine it is possible to safeguard the data that we jealously guard on our Mac. This software developed by Apple facilitates the creation and management of backups of the PC and the consequent restoration of the information contained therein.
How to backup
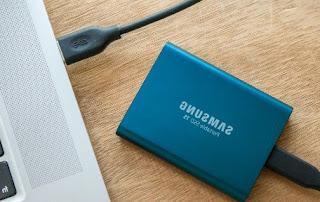
Before proceeding with the backup we must make sure we have a computer updated to Mac OSX Leopard and to have an external hard drive having, at least, the same storage space as our Mac. To start the operation you need to:
- Connect the external hard drive to the Mac via a cable
- If a pop-up window appears after the connection, then click "Use as Backup Disk"
- If the window does not appear, go to “Menu”> “System Preference”> “Time Machine”
- To proceed, click on "Select Backup Disk", to choose the disk to use and the method to follow to complete the operation
- click "Back Up Now" to start the operation
How to restore data after backup
The long awaited moment has now come, the one that will allow us to recover our much loved data. From here it is possible to proceed in two different ways to have different results:
- Retrieve the backup when the Mac starts up. When turning on the PC, the key must be held down at the same time "Command" and the "R" key. When prompted, choose "Restore from Time Machine Backup" and then click "Continues".
- Recover a single modification of a file. If we prefer this option, then it will be necessary to enter the Apple Menu and choose the item "Enter Time Machine", choose the file we want to resume and click on "Reset".
Best data recovery software for Mac
Disk Drill
Among the most popular and used software to recover deleted files on Mac, there is also Disk Drill. Compatible with OS X, iOS and even Android it will allow you to restore data from any type of device, even from flash drives, SD cards or iPods.
With Disk Drill you will be able to recover numerous files deleted from partitions HFS+, Ext2, Ext3, Ext4, NTFS, FAT, exFAT ed HFS.Among its major advantages is availability in language Italian company, with a simple interface full of clear instructions. You can choose between a version free Basic it's a Pro ed Interprise. Needless to say, we recommend you for the first one, given that the costs of the other two are quite high: 89 and 399 dollars.
The first thing to do is to start the download from the official Disk Drill page by pressing the green button. Once installed, to start the recovery of deleted files, just press on the item Recover next to the affected drive, which will start a quick scan. During the process, you will be able to see one list of recoverable files, also divided by category such as Videos, Images, Audio or Documents.
You should know that you can also perform a thorough scan, if needed, being able to stop or save the scan by simply clicking on Pause e Save session up.We have included it among the best for recovering deleted files since it allows you not only to save data in one specific folder (praised his Recover to and then Recover), but also for the function Recovery Vault. The latter has been designed for an easier future recovery of deleted files, creating a kind of backup that occupies only 1% -3% of your hard disk.
You will also have a version "portable”Of the software or using a USB key to avoid overwriting on the hard disk. What matters though, is that you will now have recovered the files or folders you thought were lost forever!
Lazesoft
Lazesoft Mac data recovery is a very convenient one free software, easy to use and above all practical. Extremely compatible with Mac OS, it will allow you to recover files from HFS/HFS+, FAT, FAT32, NTFS, EXFAT e altri, both from hard disk and from devices such as USB stick, iPod or external memories.
Also, having regard to his intuitive interface, you will not struggle to exploit it even if you do not have the language of your country. So let's see how it works and how to use it to recover deleted or overwritten files:
- To download it, from the Lazesoft official page, you will have to press on the blue box entitled Free Download Now
- Install it by double clicking on the executable and then drag the icon into the folder Applications
- After entering your username and password on Mac, launch the program and press on File Recovery
- Then select the hard disk part where your files were and hit Finish to start scanning
- Once finished, you will be able to choose the files to recover from the preview on the left, by clicking on it and taking into account the various types such as: doc / docx for documents, PNG / JPEG for photos and so on
- Press on Save Files and indicates the destination folder
Lazesoft is a great way to recover entire folders that you thought were permanently deleted! The only flaw, however, is that if your data has been overwritten after deleting them, the restore will be almost impossible.
Softtote
Softtote Mac data recovery is also a free and extremely useful program for restoring deleted data. You can use it to recover deleted folders from both internal and external hard drives, and for various types of file systems including NTFS, HFS/HFS+, EXT3, EXT4 o FAT.
This program to recover deleted files allows you to preview details, such as the creation date of the file or its size, allowing you to decide which one to recover.Compatible with operating systems Mac OS X 10.7-10.13, it is only available in English. Unfortunately, its trial version only allows you to preview the files to be recovered, without actually performing the recovery.
To download it you will have to press the button Free download from the main Softtote page and install it, preferably not on the lost file storage drive just to avoid overwriting the latter. Start the program, click on File Recovery and select the file types you want to restore. You can even target the search for deleted files by adding the tick next to "For deleted files".
Awards Ok and wait for the scan to finish, when you will see a preview of the files that can be saved. Then select the ones you are interested in and press on "Recover”To start file recovery on Mac!
Photorec
Let's see now how one of the open source data recovery software works! Highly compatible with OS X, Linux and Windows it will allow you to recover different types of files such as audios, images, documents, archives and even internet pages. Efficient and available in two versions Free e Whole, thanks to its graphical interface made with Qt, it is now also very simple to use.
Then connect to the official Photorec website, download the program by pressing the green button with the words "Free download". To start using it right away and start recovering deleted files, you will need to:
- Double click on the file exe and agree to start the program
- Choose the partition or hard drive to be scanned for file recovery
- Indicates the folder for saving the recovered files, in the "Please select a destination to save the recovered files”- but in a drive other than the one willing to scan. It is good to know that PhotoRec also supports network locations and allows you to share folders in one local network
- Press on File formats and remove the tick from the data you don't want to recover
- By pressing on Search, the search will start and the recovered files will be automatically saved in the above destination
Unlike other programs, Photorec does not allow you to choose the files to restore by recovering all the contents of the folders you indicated. Furthermore, it has two versions: the Free which analyzes only the free space and the Whole which examines all the storage space.
So what are you waiting for? Start the recovery of your lost data!
Renee Undeleter
Renee Undeleter is among the best software to recover deleted files. Compatible with both Mac and Windows, it allows the recovery of various file formats such as music, video, mail, archives and so on. Unlike others we've seen though, it's not compatible with iOS.
Even before downloading, we recommend that you:
- Do not install it on the same device from which you intend to recover the files to avoid overwriting them
- For the recovery of files from a external drive you can install it on your computer
- If the recovery is internal hard drive data, you will need a external device with more storage than your Mac and one key where to install the program
With the vital information out of the way, let's proceed with the download from Renee Undeleter's main page. Once downloaded, installed or mounted on your USB, you just have to start it on the Mac. ease of use of its graphic interface, which in addition to allowing you to select the language Italian company, invites you to press on type of scan What do you want.
You can choose between:
- Un fast partition recovery to restore data deleted by mistake and without backup
- Full partition scan which will list all the recoverable files at the end of the analysis
- Full disk scan that is, a thorough search of each partition
Then select the drive to recover, also identifying the file typology within the "Custom Settings". Start the search by pressing on NEXT and select the folders to restore, previewing the contents by clicking on "Miniature way" top right.
Click on "Recover”At the bottom right and indicates the destination folder. And here you are, the recovery of overwritten files or deleted folders!
FAQ
There are many doubts that can assail us when we are all intent on carrying out some operation with our Mac. No fear, you don't need to be a computer genius to know how to carry out all the technical operations that concern it. Sometimes, you just need to be well informed. In this regard, we recommend that you consult the following questions:
Is it possible to recover data from a broken Mac hard drive?
If our computer's hard drive is irretrievably broken, we could still try to recover the data it contains. What we need to proceed with the operation is: another computer and data recovery software, to try to extract all the files that are still recoverable. For more in-depth information, visit the recover data from damaged HD page.
Can overwritten Mac files be recovered?
If you have a backup copy of the Mac before overwriting, you can use Time Machine for recovering your precious files. Proceed as follows:
- click "Finder" and choose “Time Machine”
- If the files are in the application, select them and click "Reset", to recover the original versions
How to recover deleted files from Mac for free?
When some files are deleted from our computer, they are not completely deleted, but they are simply moved to free up the portion of disk they occupied. To recover this data you need the help of special programs that know how to do their job well. Below is a list of the best software to use in these circumstances, totally free:
- EaseUS Data Recovery Wizard for Mac. Excellent software that allows you to recover deleted data from hard drives, SSDs and external storage drives. The Free version of this program allows you to recover up to 2 GB of data.
- Lazesoft Mac Data Recovery. It is a free application that allows the recovery of deleted data from Mac disk and external drives.
- Another free and very effective data recovery program.
- Free Mac Any Data Recovery. It is a reliable, safe and advanced data recovery solution available on any Mac device.
Are the above data recovery software also valid for Macbook Pro?
Yes I am. All devices that share the same Mac OS operating system can take advantage of the same programs for recovering lost data.


