Do you often use USB hard drives to store your data or transfer it from one computer to another? Then you must have accidentally deleted some files and despaired because you couldn't recover them. Well, it's obvious that you've never tried programs specifically designed to deal with such situations.
If you're interested (and considering the fact that you're here now, I'd say yes!), I suggest you take some time off and concentrate on reading this tutorial dedicated to recovering data from USB hard drives. In the following lines, in fact, I'm going to show you what in my humble opinion are the best software on the market for data recovery from external hard drives. There are some for Windows, MacOS and Linux and many of them are free.
Well? May I ask what are you still doing standing there? Sit comfortably in front of your trusty PC and immediately test the resources I'm about to report to you. I sincerely hope that in the end you will be very happy and satisfied with what you have learned and, of course, with the results obtained. Happy reading and good luck with everything!
Useful information and recommendations
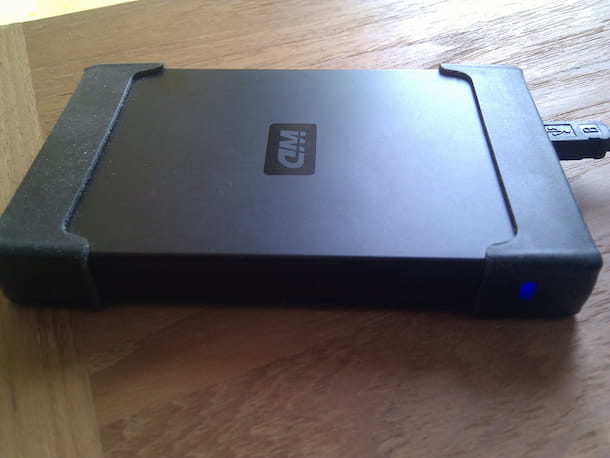
Before getting to the heart of the matter, so let's find out what are the best resources you can use to recover data from external hard drives, it seems to me that we need to make some clarifications regarding the execution of the activity in question.
Let's start from one point: recovery of deleted files is indeed feasible, but only and exclusively if the areas on the disk where they were saved have not already been overwritten by other data. With this in mind, in order to increase the chances of being able to access the data of your interest again, it is essential to reduce disk usage as much as possible.
So, if the data you deleted by mistake from the hard disk hasn't been overwritten yet, using the resources I'm going to show you in the following lines you'll almost certainly be able to recover it. Otherwise, I'm sorry to say, you won't be able to access them again. In this second case, the only way forward is to rely on specialized centers.
Programs for data recovery from external hard drive
Now let's get to the heart of the matter and find out what software you can use to recover data from external hard drives and how to use them. Feel free to choose what you think is best for you.
PhotoRec (Windows/macOS/Linux)

The first of the useful programs for the purpose covered by this tutorial I want to tell you about is PhotoRec: it is a free and open source software that, contrary to the name, allows you to recover not only photos and images, but also any other type of deleted files (videos, music, Office documents etc.) from external and internal hard drives, SD cards and USB sticks.
It works on Windows, MacOS and Linux, but only the variant for Microsoft's home operating systems has a graphical interface, which is why I chose to tell you about the latter. I would also like to point out that the software comes with TestDisk, another program suitable for recovering damaged partitions and disks.
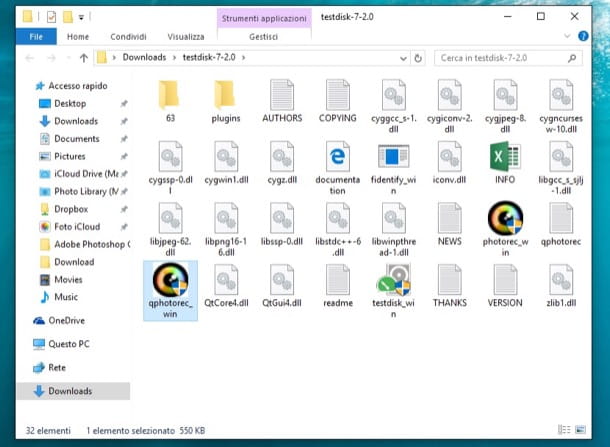
To download PhotoRec to your computer, go to its official website and click the Windows 64-bit link (if you are using 64-bit Windows) or Windows link (if you are using 32-bit Windows) in the middle of the page. Next, open the ZIP file containing the program, extract the content to any location and start PhotoRec by double clicking qphotorec_win.exe executable.
In the window that appears on your desktop, select the drive for your external hard drive using the drop-down menu at the top, indicate the main partition of the device and check the box next to the FAT/NTFS/HFS+/ReiferFS and Free options.
Now click the File Formats button at the bottom and choose which file formats you want to search and recover. By default, all are selected. To limit your search to just a few, simply press the Reset button, tick the extensions you are interested in and click the OK button.
To conclude, click on the Navigate button at the bottom of the main window of the program, indicate the location on your computer where you want to save the data recovered by the software and press the Search button, so that the search and recovery of files can begin.
MiniTool Power Data Recovery (Windows/macOS)

If you are looking for a valid alternative to the tool mentioned in the previous lines, I suggest you to try MiniTool Power Data Recovery: it is a program for Windows and macOS for data recovery from external (and internal) hard drives that allows you to restore any type of deleted or lost files in a fast and easy way. The basic version is free and allows you to recover up to 1GB of data. To get around this limitation you need to buy the paid version of the software, which costs $69.00.
To download MiniTool Power Data Recovery to your PC, if you use Windows, connect to the program's website and click the Free Download button. When the download is complete, open the obtained .exe file and click the Yes button in the window that opens on your desktop. Then, press the OK and Next buttons, select I accept the agreement and click the Next button again (twice), then the Yes, Next and Install buttons and, to finish, press the Finish button.
Once the software window appears on your desktop, click on the Removable Disk Drive item on the left, select the external drive you want to work on from the right side of the window and press the Scan button at the bottom right.
Once you have finished checking the drive, you will find yourself in front of a list of files: deleted files are those marked with a red "x" next to their icon, lost folders are marked with a red question mark and RAW files are marked with a red exclamation mark.
If you want to preview (if available) the files, select what you are interested in and click the Preview button at the top. If, on the other hand, you can't find specific items in the list of files that have been found by the program, press the Find button (located at the top) and help yourself with the search bar that appears.
To restore one or more files, place a check mark next to their name, click on the Save button (located at the bottom right) and, using the additional window that opens, select the folder to which you want to export the data. Finally, click on OK and wait for the recovery procedure to finish.
You can also save a list of all the files found by the program by clicking on the Export Scan Result button (always placed at the top), and filter the results according to various criteria (e.g. name/extension, size or creation date) by clicking on the Filter button (always placed at the top) and placing the checkmark next to the desired options
Are you using a Mac? Then, to download the program, connect to this other web page and press the Free Download button. When the download is complete, open the obtained .dmg package, click on the Agree button in the window that appears on your desktop and drag the program icon into the Applications folder of macOS. Then, right-click on it, select the Open item from the menu that appears and type the password for your user account, in order to start the software, however, bypassing the restrictions that Apple imposes on applications from non-certified developers (which must be done only the first time you start the software).
When the program window appears, press the Undelete Recovery button, select the external disk to be analyzed from the list shown and click the Scan button (bottom right). The rest of the operations to be performed at this point and the available commands are practically identical to what you saw a few lines higher up on Windows.
EaseUS Data Recovery (Windows/macOS)

The programs I told you about didn't convince you in any particular way, so are you looking for some good alternatives? Then try EaseUS Data Recovery. It is a software for Windows and MacOS with which you can recover images, videos, documents and various other types of files from external and internal hard drives as well as USB flash drives, SD cards and any other media. It is free but allows you to recover up to 2GB of data. To get around this limitation you need to upgrade to the paid version of the program, which costs 81.36€.
To download the software on Windows, go to its website and click on the Free Download button. When the download is complete, open the resulting .exe file and, in the window that appears on your desktop, click the Yes and OK buttons. Next, press the Next, Accept, Confirm, Install and Complete buttons to complete the setup.
To download the program on macOS, instead, connect to this other section of the EaseUS Data Recovery website and click on the Free trial button. When the download is complete, open the obtained .dmg package, drag and drop the software icon into the MacOS Applications folder, right-click on it and select Open twice in a row, in order to start the program bypassing Apple's limitations to applications from non-certified developers (which should only be done the first time you start the program).
Now that you see the EaseUS Data Recovery window on the screen, select the drive for your external hard drive and press the Scan button at the bottom right to start the analysis process.
Once the scan is complete, you will see a list of all the deleted files that the software has found. If you can't find what you need, you can filter the various data by type by clicking on Filter at the top and selecting the category of files you are interested in. If, on the other hand, you need to preview a given file (if available), select it from the list and click the button with the eye at the top right.
Once you have found the files you want to recover, select them, click on the Recover button at the bottom right, indicate the location on your computer where you want to save them and click the Good button. There you go!
Recuva (Windows)

Finally, I want to tell you about Recuva, a freeware software for Windows operating systems only that allows you to recover deleted files from external and internal hard drives and any other type of media. It is very easy to use, highly intuitive and is developed by the same software house as CCleaner, the famous PC cleaning and maintenance program. Please note that it is eventually available in Professional variant, for a fee (at a cost of 24.95€), which includes some extra features.
To download Recuva, visit the program's website and click on the CCleaner.com link under Recuva Free. When the download is complete, open the obtained .exe file and, in the window that appears on your desktop, click the Yes button. Then, select your language from the drop-down menu for the choice of the language located in the top right corner, remove the checkmark for the installation of any extra programs (e.g. Google Chrome) and press the Install button. Then complete the setup by clicking the Run Recuva button.
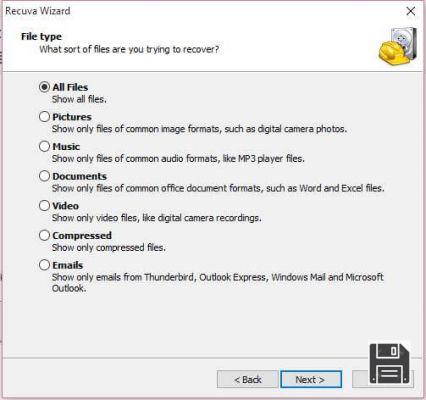
When you see the main window of the software on your screen, click the Next button and, depending on your needs, tick the box next to All Files (to locate and recover any file type) or the box next to the exact file type (e.g. Pictures, Music or Video).
Then press the Next button once more, select the On media card or iPod or In a specific location option (and indicate the path to your external hard drive by clicking the Browse button) and click the Next and Start buttons.
Once the disk scan is complete, select the files you want to recover from the list. Note that only files with the green sticker next to them can be recovered completely, while those with the orange sticker are partially damaged and those with the red sticker cannot be recovered. To finish, click the Recover button and specify the folder where you want to save the files.
If no files are found at the first scan, the program will propose to perform a deeper scan. You also agree to this by pressing the relevant button, and then proceed in the same way as I indicated earlier.


